hi all im puting speedo on me 199A i no theres to ways you can mount the speedo can any one tell me witch is the best way? allso the speedo cabel is runing from the rear wheel witch way do i rout the cabel last time i tryed it i whent throw the loop on the swing arm across the bash plate. and up throw the loop on the frame but the cabel keeps poping out from under the magnot cover is there a beter way of routing the cabel so this dosnt happen? one more thing is how tight do i tighten the bottom.and top yoke nuts? i know they should be tightend up with a c spanner but havent got one. and dont no what size to get?
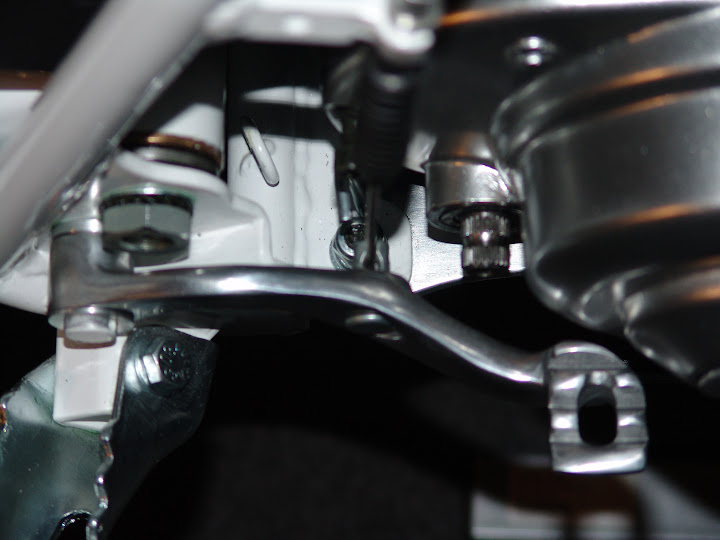
Best way to mount the speedo drive is still the rear, for mounting the cable, there should be welded steel ring (loop) near the mount for the side where you have to feed-trough the cable. (I believe that is the one you mentioned already in your posting).
Then there should be a second steel ring (loop) on the right side where the bash plate is mounted where you again should feed-trough the cable, see in the pic:
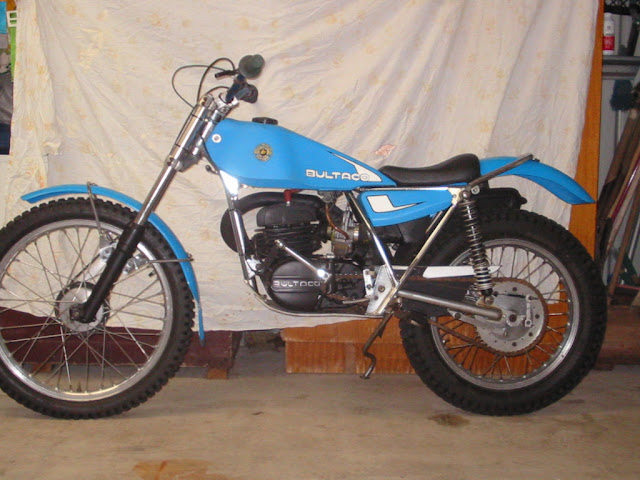
From then its up to you if you want to mount the speedo on the top of the upper fork clamp or at the left side of the front engine mount. The first solution is much better readable, the seond better hided.
Standard was the top mount, but many riders back then changed the position down to the left of the front engine mount because the speedo was better hided there and this position was standard with the older models up to 1974 I believe so you could simply order the bracket for this mount as a spare part.
For the top yoke nut I take a big ratchet socket for the yoke for the bearings I use a special spanner, you can take a small chisel too, but use it very carefully.
The original grips for the Sherpas as I know where made by Gonelli and are in black color, (as you mentioned grey in your first post?), The Gonelli grips have the Bultaco logo stamped in the rubber on the ends of the grips.
Are you searching these, should I post a pic for comparison?
(I don't have made any pic's yet, but it's easy to do so)
EDIT
Found them, here the standard ones:
With rips, Enduro:
Modiefied standard ones with an extra noth to safty wire the grip
and no outer humps on the ends. (Back then it was very commen to grind away the outer humps of the grips, here this is already done).
There were some Sherpas fitted with flat-slide carbs in the end of the seventies, they used the carbs from Lectron:
I believe the use of this flat-slide carbs came more from the MX and Enduro before the better Japanes carbs like Keihin showed up. As the Lectrons showed good results for the MX and Enduro bikes some rides tried them out on their trials bikes too.
Here a Pursang that comes with three carbs, the Bing, (original), the Lectron which they will have used as an improvement and a Keihin when these showed up in the mid 80's.
A very nice bike, with Simmon fork's! and long travel Koni's it was prepared by Gary and David Bailey, sadly it is on sale over the pond and no bargain. Baileys Bultaco on sale
Anyway the Lectron carb is best for bikes that runs in mid to upper rpm, I do not believe that you have any benefits with this very special carb mounted in bikes that produces their power from idle up???
Would be interesting to hear any experience from someone, maybe from USA and Australia as there where most Lectrons sold?
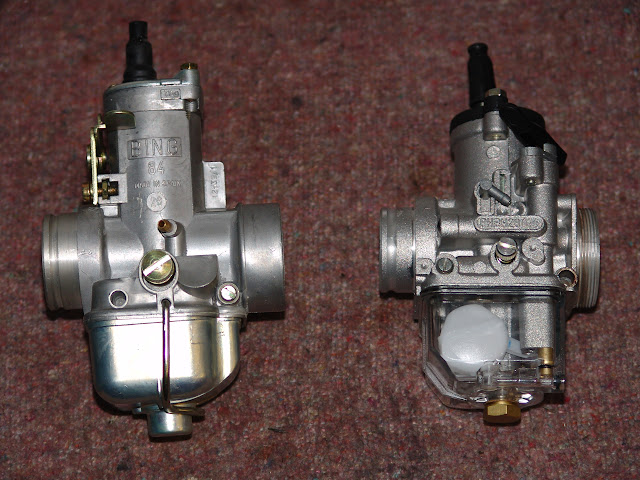
The Dell'Orto PHBL is an old mate in carburation, you could buy this carb in the 80's, the carb was already used on Bultacos back then too, (as f.e. the Lectron carb in the end 70's), so I think it is contemporary. The carb is at least where I live easier to set up/jet, then it is so much easier too to get spare parts, different jets, for a Dell'Orto then for a Bing 54.
The smaller rubber intake for the carb sounds interesting, but I will stay with my standard one, so if I need to swap the carb again, (for setting up the bike in delivery condition or the frequently technical inspection from road and traffic authority in D, (the reg. papers have the Bing recorded), I don't need or have to hassle around with any other extra pieces.
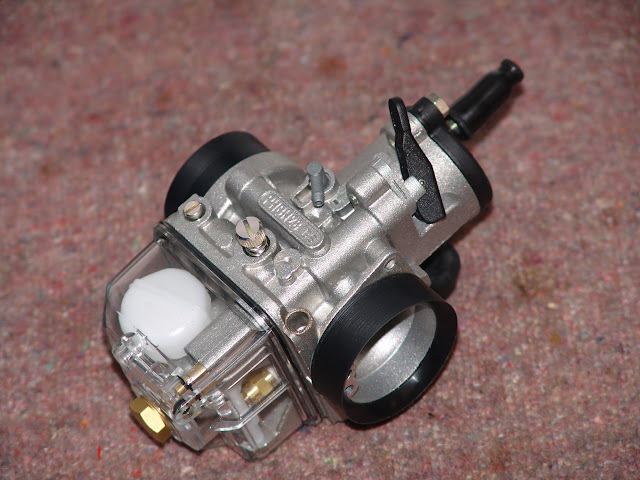
Another + point for the Dell'Orto is the combination with the transparent bowl that is as Felix wrote in the Trialsport article something for lazy guys that want to know in forehand if there is a need to clean the bowl or not, (beside the tricky look).
There is not such a big difference in power output between the both carbsin my personal experience, beside that the engine does respond better and runs more even, (consistent), with the Italien carb .
You need to turn you a bushing that has the outer diameter of the Bing and the inner diamter of the Dell' Orto and then it will fit very good. I used polyamide for the bushing. Inner diameter of the bushing was turned very close to the Dellorto so it sits very thight. For the intake side of the carb I made a srew on bushing where the inner side is curved:
Comparison carbs, Bing and Dell' Orto:
Dell' Orto with bushings on both sides:
The transparent bowl is just an add-on, contemporary!, as I don't like the black plastic ones, these transparent
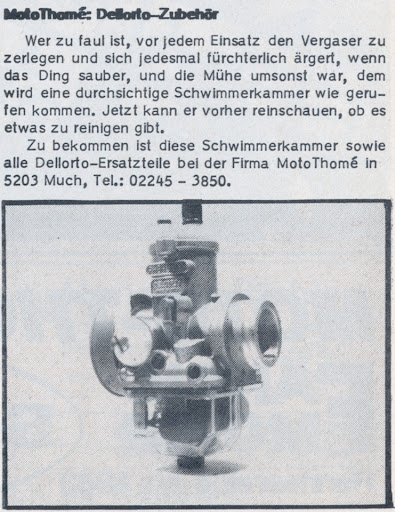
plastic bowls where reprted in German Trialsport magazin in 1981, you still get them from Malossi in Italy,
the given adress in the 32 year old article shown below doesn't exist any more:
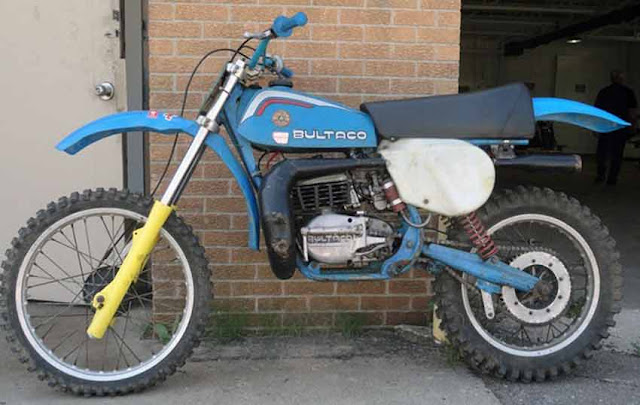
hi all im looking for some stickers for my fork sliders bultaco ones tryed bultaco uk they dont do them so as anybody know were i can get some from
There where a lot of different stickers on the lower fork sliders back then, just to name the most commen back then, some had "Michelin" others "Bultaco"(*) even "Betor" Stickers for Bultaco showed up back then.
Some had the standard Bultaco logo and some even had these tiny round Bultaco Logo decals glued to the lower stanchions (just under the dust covers of the fork).
Which one do you need? Ypu get some of the mentioned above from Iv
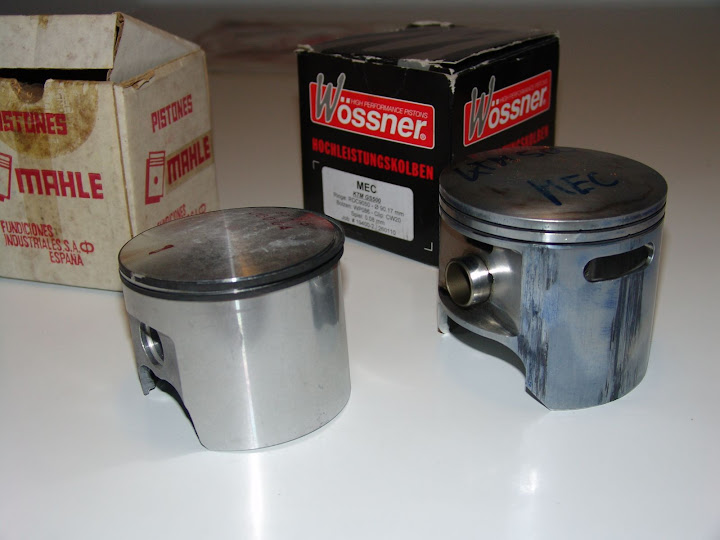
NOS pistons are still in limited numbers available. They don't have the holes you have to take the measurements for drilling the two holes in the piston from the cylinder or the old piston, (if you trust the holes of old piston).
When I got the piston I was again astonished about the size and took a picture in combination with a piston of a 500cc KTM engine, this is really a big "bucket" for 350cc.
In case you don't find any better matching color a second layer of clear coat paint on PU basis will also solve problems with the paint and petrol, IF the clear coat that might be available to your color is based on PU.
When doing rattle can paint jobs the clear coat has as a rule of thump to be applied around 30 minutes after you have done the regular paint job. If you apply the clear coat just after half an hour the paint layer will insolveable connected with the paint. Give's a better protection against scratches, ... too.
If you want to strenghten the paint- and clear-coat- coatings the painted parts should be temperd, (heat threatend), a couple of hours with around 80
found a paint in halfords yesterday that is a close match
a good find.
The Italjet frog green is really wicket, only a little bit darker, (more green), and a touch more yellow then it would been perfect. As you need at least two coatings and if there is no rush I would try to find the race green 77 or Opel Signalgr
To be exactly I have them both (Betor and Magicals) and yes the Magicals are much better then the Betors they even look better too.
BUT the OP has given a money limit and a pair of good Magicals are twice as much as the OP want to pay. As this is his second Bultaco rebuild, do we know what he want to do with the bike?
I found the pic's that I did not find while writing down my first post in this thread, here all three shocks for a comparison, (in the middle the original ones):
It is also possible to outclass even Magical shocks for around four times as much money the OP want to pay:
Extremly tricky looking and still contemporary and very good working if you use nitrogen as gas are French Fournales shocks, these where used by some world class riders in the beginning eighties, one Bultacos and Italjets (which are the green clones, I had some of them too).
Has I said, Built with love to be a bit diferent. You can just see the hours put into them, and not a load of dosh threw at them, to make them look all the same. I bet the owners treat riding them has a secondry measure.
Regards Charlie.
+1, this summ's it up very well I believe (not sure???).
These French and Italian builders have this kind of passion while doing things. Their ability to combination technic and design is special, another one:
Yes this is one I believe, I'am not so familiar with the brand,
there are different puller models available, here some others that also will do the job without arms popping off, this one is very study and helpful also in other situations:
This one would do the job getting off any smaller bushes or bobbings from axles too:
There is a Motobecane trials club in Belgique, they have lots of pic's and videos with there Montebecane trials bikes: Montebecane Trials Club
Tobec's is a French a nickname for "Moped" I believe. Small bikes with 50cc and pedals from Montebecane and Motocomfort as they produces thousends of these small 50cc bikes for getting around. You find them googling Pic's search using "Tobec AV 42" / "Tobec AV 44" / "Tobec AV 46". I have still a likewise build "Tunturi mopo" from 1964 with Puch fan cooled engine very nice bikes for getting around, (sadly no pic's on hand to show ).
If your gear puller is fitted with an additional joint it is nearly impossible, If you have a puller with straight arms mounted to a rectangle arm where they can be fixed in a adjustable position it should work as it stucks normally not very much?
May just a little bit of heat or better warming up to get the rubber soft and then turning with a good plier on the edge not the surface for the oil seal?
To the part itself, may be Bultaco UK have them, if not Orlando Calonder should have them, or just refabrication, not a so difficult part to reproduce as it is round and you "only" need a lathe.
The bobbin (Kurbelwellenbüchse) should been removed to replace the the inner O-Ring as you said.
May be you need a gear puller to pull it out.
After intsalling the crank seal it is first possible to mount the bobbin as the outer surface of the bobbin is the running surface of the outer crank seal. How did come the oil seal of the crank seal off if you did not detach the bobbin? As the seal has to slip over the edge of the bobbin it must have been not so easy?
May be it's just some corrosion use some penetrating oil and wait, while attaching a puller small strokes with a small hammer might also help, (no force!). I personal would not try to heat up the shaft of the crank, might change the hardness of the crankshaft.
The old mesh is the riminding part of the old insulation which kept your former rockwool insulation material which sat between the mesh and the holetube protecting it from beeing blown away. A new wrap with silencer insulation pads and then with silencer steel wool will reduce noise and might too improve performance.
If the holes of the holetube look clogged clean them so the holes have the full diameter, this will increase noise reduction, easiest way to clean the holetube is blasting.
A: If the discoloring, ... is real nice patina it might look good too, it's may be better to preserve it as it is.
B: If there are discoloring and scratches from former abuse by a pre owner in combination with erratic painted logos you might not have any consederations about the texture because the erratic logos and scratches are so ugly that you have to get rid of them.
C: Mounting a brand new gas tank, (you get the gas tank as a replica as already mentioned here before), on a bike with has some patina might disturb the complete look IMHO too?
So as a gas tank has something of the "face" of the bike this question is not so easy to answer.


 a good find.
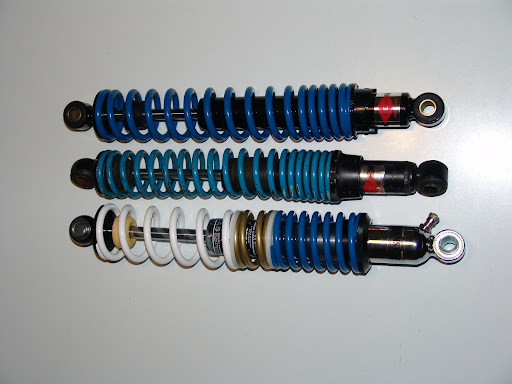
 (around 700


 ).
).
Throtel Grip
in Bultaco
Posted
Still available in Spain through Motos del Abuelo: info(at)motosdelabuelo.com
Their parts inventory you find here: Bultaco parts catalog (It's a PDF, will take time, look up page 16. (2,50