| |
-
You can measure the fiber and steel thickness. Also measure the Belleville washer. If they are worn too think they need to be replaced.
-
In that gearbox there was the shift pawl that pulls or pushes the shift drum. The shift drum has pins that protrude. There is a roller that pushes between the pins to ensure proper engagement. Both the pawl and the roller have springs to position them properly. These springs weaken with time, also there was an upgrade done to a stronger spring. It sounds like the spring on the roller may have broken. I would recommend changing both anyway. The parts are not expensive.
Certainly check the items suggested by others because they are right in the immediate area of the springs. .
You do have to remove the right side cover and the clutch and basket to have good access to these.
-
Yes, you understand correctly. The piston should not contact the head or spark plug. In fact, if the piston does hit, bad things happen.
New gasket sets come with multiple base gaskets of different thickness. Thinner gasket will reduce the squish and give higher compression. Thicker gasket will give less squish and lower compression.
I know a dealer who always uses the thickest gasket because it eliminates the chance of the piston hitting the head or plug, it makes the bike easier to kick over, and only really top riders would notice the difference in power.
-
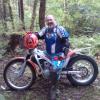
That little CRF looks like new! Whoever bought it got a nice bike.
There is nothing inherently bad about the stock tank and seat.
I often see people recommending a one piece tank seat rig when people get an older bike. Sure they look nice, and are usually a little narrower, but they are not cheap.
If your stock tank is in really good condition with no dents or other damage, it can be worth a lot of money to people doing restorations. I have seen a couple particularly pristine looking tanks sell for more than you paid for the whole bike.
-
Yes, I understand you were asking about the OKO carb. I chimed in because I feel I got that "holy grail" simply be a good cleaning and rejetting the stock carb. No new carb, searching for a new throttle cable, etc.
What did I find amazing?
1) Bike used to need lots of choke to start and was took a long time before I could turn the choke off and ride away. Now, choke, one kick, turn off choke and ride.
2) No bogging or throttle lag.
3) Far better power at low speed and much smoother acceleration through mid range.
4) Better high end power.
Bike used to feel underpowered, almost like it was a100, not a 200. The same amount of throttle in first that used to make the front end just feel light, now gives me a 2 foot high wheelie. And all for US $12.
The only down side I see now is that I will have to fix those front brakes to better slow this thing down.
If you do the OKO conversion, I hope you will post your impressions.
-
Check your local auto parts store. They probably carry the parts or can make up a hose for you quickly. Take a sample with you.
-
Dadof2's description of gapping the plug is spot on.
When on a 2 stroke, I ALWAYS carry a spare plug and wrench (spanner). Plugs rarely give any warning at all before they foul. And they usually fail at the farthest point from the truck.
-
There really should not be things floating around in the cooling system. And the water pump should not be "scratchy." There is a bearing and seal on the pump shaft. If something foreign gets into the pump, it will not circulate as it should - result overheated engine and steam. I would be taking a very close look at that piece of material in the pump vanes to try to figure out where it might have come from.
Since you have the motor torn down, do a thorough flush of the cooling passages. I would pull the radiator too and give it a good flush in both directions and collect the water to search for other pieces of loose material.
Squish height is the distance between the top of the piston to the head when assembled. After assembly, you put something like soft electrical solder through the plug hole, and turn the engine over by hand. When the piston come up it will "squish" the solder. move the piston down, them remove the solder and measure it's thickness. There are specifications for what that measurement should be.
Too little space between the head and piston will give higher horsepower but make it very hard to kick start (high compression). Too much space will give lower horsepower but be easier to start (lower compression). High compression also requires higher octane fuel to prevent pinging (pinking in UK).
On the older TXT, the adjustment for squish height was to use different thickness gaskets at the cylinder base. Kind of a pain in the @ss but only done at rebuild.
Some of the newer bikes have changeable compression inserts in the head so squish may be set differently.
-
It sounds like your switch is wired opposite of how the bike is wired.
Some bikes use "normally open" kill switch, some use "normally closed." Normally open would mean there is no connection to ground (earth) until you press the switch (close the circuit). I think GasGas uses "normally open." I know the JT25 I had was wired that way.
Does the switch have 3 possible places to connect wires? One would be "common", one "normally open" and one "normally closed."
-
I remember that the bike was the hot ride of that time. Must have been the Z1. I know it took about 5 minutes for my eyeballs to return to their original position after being pushed to the back of my head.
Great that Spencer got to ride around and did well. Keep him at it!
-
Is your stock carb completely warn out? If not, consider changing the jetting. I just changed my jets and the difference is amazing! #40 and #110 jets.
-
-
Nice looking bike. 60 mpg on the highway! That is amazing. You story about acceleration reminds me of a ride I had on a buddy’s bike way back in about 1974. I was riding dirt and also had a Honda CB450 street bike. Buddy took one of the hot ticket Kawasaki’s (I think it was the first 1000 cc, maybe 900)and stripped it down, built the motor and set it up as a café racer. It was a screamer. I took it for a quick ride, front tire came off the ground in 1st and I don’t think it touched again until I backed off in 5th. I wasn’t watching the speedo but I am betting about 120++ mph in 1000 feet. Stopped, brought the bike back to my buddy and said “I’m done.” I know I was very lucky that nothing went wrong. I also knew at the time that I could not own a bike like that because my right hand only knew, on or off the throttle. Fortunately, I knew enough that I did not possess the self-control needed to have a bike like that.
Back to the TY. Factory had 13/51 tooth sprockets. I had a ’76 TY175 for a while and it had stock gearing. I remember it being way too fast for the 2 events I rode on it. My buddy has a beautiful TY175 and I think he runs 11 tooth front. With the force it takes to pull the clutch, it is good on these bikes to be geared low enough that you can ride a Novice section on the throttle, not slipping the clutch. If I remember correctly you don’t use the bolt flange on the 11 tooth, you have to use a spacer behind the gear and a circlip to hold the sprocket on. Don’t worry about the few teeth – remember the TY only has about 10 hp.
Did you get your son on the bike? How did he do?
-
Search on google images "Harley Davidson 175 Enduro" or "AMF 175 Enduro"
Harley was owned by AMF in the early '70's. They did not build the bikes. They were built under contract by an Italian company if I remember correctly.
-
Yeah, that's more smoke than it should be making. Steam is a result of overheating. Could be due to bad water pump, pump seal, low coolant, and extreme lean running. While you have it apart, I would do all the seals, bearings, water pump (shaft and impellor), any gaskets that are not in really good condition. I hate to get it all together and still have a problem because I tried to save a dollar or two.
Make sure you check the squish height on reassembly.
-
I am sure that ever one of us has had a similar experience when we started.
Welcome to the world of too many dabs!
Have fun!
-
Yes, a lot of guys disconnect the auto-lube and run pre-mix. I think the mix should be about 50:1. Search the Yamaha forum for oil or pre-mix. I am sure you will get a lot of info that others have posted about what they like and use.
For trials, most people go to a smaller front sprocket. Before you throw out the existing chain and sprockets, search the Yamaha forum. You don’t have to change them all at the same time unless they are really badly worn. Smaller front sprocket makes it easier to ride slow and may give you that 1/8” you need to remove one link from the chain.
Cool, original plug in original box. Collector’s item?
You gonna get your boy on it this weekend?
Bill
-
When I bought the bike, about 4 year ago, it ran great but needed a lot of love to get it into good riding condition. The long seat was an option from Yamaha when it was new. They sold that seat and a kit of parts to reposition the footpegs, shifter and brake pedal for using the bike as a trail bike. It’s funny but after riding modern trials bikes with no seats for so long, I forget I can sit when I ride the TY.
The bike came with the metal tank that was damaged and poorly repaired and rusty inside. It also came with the plastic unbreakable tank. That was an aftermarket tank in the 70’s. I put one just like it on the Honda enduro bike I was riding back then after playing trial rider and dropping the bike with the tank right onto a sharp rock. I could fix the metal one but since this is used as a “buddy bike” and “new rider test bike” I leave the plastic because it makes the bike pretty bullet proof.
I recently made some lower peg mounts and extended the swing arm. Super stable now. Fun bike. Front brakes are still more of a suggestion to the wheel to slow down. LOL. That’s why I did that funky bend on the lever so I can use 2 fingers and pull it all the way to the bars.
I don’t dare ride a bike with 900 cc’s. I know I would want to use all that throttle.
You are so very lucky to have all those trails close to your house. I just drove 120 mile round trip today to build 2 sections for an upcoming trial in September.
I laughed out loud when you explained that stoppie pic.
-
On the left side of your bike just below the red cover is a sight glass. That is for the 2 stroke oil. Pull the cover off and the plastic tank can swing out for filling. The throttle cable has a Y joint in the middle with one side going to the carb and one side going to the oil injection pump (on the right side inside the clutch cover you can see this cable going into the housing on your bike). You put straight 2 stroke oil in the oil tank and straight fuel in the fuel tank. No premix needed.
For best grip, you want to run the tires really soft - In my modern bike I run 6 in front and 4 in rear. With older bikes, the tires can come off the beads at those low pressures. On my TY I run 7-10 in front and 7-8 in the rear, depending on trail conditions. Be sure to run rim locks and take the nuts off the valve stem. Reason: as the tire slips around the rim, it will pull the tube with it. If you leave the nuts on it will eventually tear the stem from the tube which is virtually impossible to repair. Of course that will happen at the farthest point from the tuck on Sunday when no cycle shops are open. With the nut off, you can see the stem start to lean and then get sucked into the rim, giving you a warning to reposition the tire and tube before it tears the stem off.
-
For a really new rider like your son, I suggest not jumping too quickly into riding slow trials techniques. Let him spend time on the bike having fun just learning to ride it around. One really nice thing about the old TY’s is they are so easy to ride. But a new rider still needs to spend time making things like pulling the clutch and front brake, shifting and rear brake without having to stop and think about it. It needs to become an automatic response. Also, there needs to be some building up of finger and wrist muscles. Remember, you want it to be more fun than those video games.
To modify the pegs I took a piece of flat stock and bent it into a shape and size similar to some KTM pegs I had. I think they ended up about 2” front to back and 4” from pivot to the outer end. I welded those around the original pegs, then added some small pieces to support the new outer rim to the originals. Then I ground some teeth on the top side to provide grip to the boots. I will attach some pics of the ugly bike that sort of shows the pegs if you zoom in. I added the extra in front of the pegs because the bike was a bit front end light. I have since extended the swing arm – remember, this is my ’74 TY250.
For learning, the universal tires will be OK. They will have about 35-40% of the grip of competition tires. They wear like iron but watch the sidewalls for cracking.
Try to leave the “idiot” in the shed. Remember you have a 37 year old bike with old suspension that had only about 4” of travel when new. Wheelies, OK, bunny hops? Gonna take some serious body movements to do that! You might want to take the lights off before you let the “idiot” ride. The last thing you want is for your son to see you get hurt.
For specific things like oil recommendation, cable sources, etc, I would suggest to search or post your questions in the Yamaha or Twin shock forums below. I am still using the stock cables, just really did a thorough job of hanging them up, working in solvent, and then lube oil to get them to work smoothly. If they are broken or frozen with rust, then replace them. Moving the clutch and brake perches inward on the bars will put your fingers at the end of the levers, giving more leverage. Some people like to bend the ends of their levers so you can use only 1 or 2 fingers and leave the other fingers with good grip on the bars. I will attach a pic of the front of my bike so you can see what I mean. Yes, I heat bend that crazy bend on purpose.
I think Trails Central is the best Trials site there is. For older Yamahas two great sites can be found by searching for “B& J Racing” and “Tony Down, Black Cat.” I find a lot of parts on eBay.
-
Yes, many techniques that work in higher speed riding do not work so well for slow speed. Leaning, for example. At speed, lean with the bike, riding slow, lean opposite the bike. A riding buddy tells me "go right to go left and go left to go right. The biggest help to that is to keep your outside elbow up and your head leaning away from the turn. As soon as you lean your head into the turn, you will dab on the inside. Its almost like your foot has a string to your head.
For some reason, the pics did not open the other day bit they did now. Nice looking bike - very original.
A couple suggestions:
1) get some bigger pegs or if you can weld, make some extensions that go wider and longer. Beware this may interfere with your kicker. I took the sprong off my right peg and ground on it enough that it will stay up out of the way while kicking.
2) those look like trials universal tires. They are better on pavement but not so good for real trials riding. Competition tires have much softer rubber and larger spaces between the tread blocks for better grip. They do wear pretty quickly on pavement though.
Did you get the little tool kit in the little box under the steering head?
-
Only 6 months riding and she's already tackling that terrain? Awesome!
Looks like you have some great riding area.
What a great way to have family time!
-
That's awesome! A new (to you) bike in the garage and a road trip with the family. Also great that it started and runs so well after you took time to clean things out properly. With the dirty tank, I would recommend adding an in-line fuel lifter.
As for riding, watch some of the training videos. Get some peg time, just learning the bike. One really good exercise is to take a couple items (blocks of wood, soda bottles, rocks, whatever), set them out and ride figure 8's around them. Lean the bike into the corner, lean your body out of the corner to maintain balance, gradually ride slower and slower, making the figure 8's smaller and smaller. Try to do that at idle without using the clutch.
Most importantly, have fun!
-
Here's a trick for next time. Remove the inner pipe, hold it with vice grips and burn the carbon off with a propane torch. Finish with a quick wire brushing.
-
No doubt the gutter seal will seal the rim to prevent leaks. I wonder if it will make it impossible to tighten loose spokes in future. Also, it will do nothing to stop the corrosion from continuing eat attack the rim.
I would recommend taking these steps if you want to keep that wheel.
Clean any loose material with a brass brush.
Use a mixture of Baking soda (sodium bicarbonate) and water to neutralize the corrosion.
Dry thoroughly.
Apply a coating of either alodine or corrosion prevention paint, specific for aluminum.
Then either seal with the gutter seal or simply use a tube.
When using a tube, do not use the nut on the valve stem. That way if the tire / tube slip, you will see the valve stem pulling to the side so you can correct it before the stem tears out of the tube.
|
|