| |
-
Yes, Trials was the only innovation they had to production for modern OSSA. They made one non-operational prototype enduro (for sale now) but never got even a running prototype. To bad, it had interesting ideas.
-
I don’t think a drain hole. With the location and original top, I’ve never gotten water or even much of anything in the airbox. Around here (not much dust) I almost never had to clean it.
-
OSSA has a quite modern bike- the gearbox re-design for servicing already done. Just a few things and would be competitive again.
-
The 2015 Explorer I recently got was worked on by someone that should not be allowed anywhere near one of these- heck any bike at all. Due to some issues from previous wrong assembly etc, I wanted to pull gearbox. There are very small screws with a 3mm allen. Why so small, I have no idea. They are plenty big for a much larger head.
Anyway, one of them had the allen stripped by the person, another the allen wrench broken off. Fortunately, I came across this before and the fix was easy. I found some small mounted stones that I could use with my Foredom dental handpiece. I connected up a vacuum to get away as much grit as I could, and made an opening in the clutch hub a bit larger. That way I can fit in the special turned down ‘RocketSocket’ and take those out. About 20 minutes of grinding, tapping in the RockeSocket and both were out!
Yes, it will require very careful cleaning. But it is out and I can address everything. Too bad OSSA didn’t make those opening a little larger to begin with and make those bolts a better setup. Maybe I will design some that will take a 5mm allen. I think I will
-
I pulled one recently. If I recall…
First I removed the radiator. It is really easy to remove and gives a lot more room. I unlcip the top hose (put a small tool under one of the small holes and they pop right apart) with both hoses unclipped, move it back a little to disengage from airbox, then sift up. You can pry, but be very caerful. Undo power to fan before complete removea.
Remove throttle body, move airbox up a bit- then very carefully remove sensor- I suggest warming the hose and grommet and do NOT force it. They break very easily. Once those are out, it will pull down and out easily.
-
I get parts from the UK for my Lotus all the time. Usually the costs are not that much at all (a full chassis on the other hand cost more to ship than it cost).
The Ti is pretty light.
-
-
I got a quote from a different outfit. Looks like I could sell them for about $600 in Titanium, with all the pins included. I am ordering one set and I will see how the quality is and do a final on making sure my design is correct. I already fit my 3D printed parts and all seems good, but of course I cannot put any sort of load on the plastic parts at all.
This is good news. The main link bearings is additional cost, the ones I got so far were not cheap- but I likely could source the same ones someplace else for less. It will have small grease fittings on all the pins.
-
I looked up how much these cost in Ti when the place in Europe was making them several years ago- over $1000.
I did some minor changes- fit my 3D printed parts to the bike to make sure things fit right and there is clearance and they fit. Not much room in there to make things much different, so really a change of material is about it. I don’t think enough room to put needle bearings on the front pivot and fitting in the rear (in the swingarm) would likely require machining the swingarm- and I doubt enough material to do it anyway. But the middle pin gets the most stress anyway (well, I think so) and certainly the most exposed to the elements.
If anyone wants a set, let me know. I have not ordered one yet, still checking a few sources, but plan to do so I think.
edit;
The Czech made set I had also used the 16mm pin and I found it very robust- the bike is still out there running with the setup (I sold it a few years ago to try electric- but the EM had too short of range). They kept with the teflon bushings, which are a bit of a pain to get out (reinstalling is easy). Plus I think the bearings will be quite a lot easier on the pin.
-
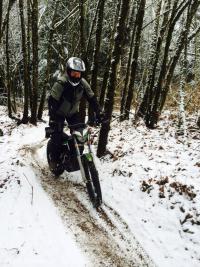
2015 Explorer. I’ve seen several Explorers that had the rear fender mount areas broken- there the huge handrail is mounted. I take those off anyway, since they get in the way when getting weight wayback.
So I designed some bushings that will fill the broken sections and press against good part of the fender. This allows easy firm mounting of fender without grabrail, especially if the parts are broken.
-
Recently I heard they are moving along well with electric motorcycle. I have not heard about any petrol ones-either yes or no.
My understand is OSSA was never merged with GasGas. They just had an agreement for joint manufacturing/distribution. When GasGas went under, OSSA was still ‘alive’ but of course didn’t have a place to build bikes or ship anything. I’m sure they didn’t have money, the reason for that joint venture in the first place.
-
I got one quote for the modified linkage in Ti.
I think in the $850 range, plus getting two needle bearings for the centre link- getting rid of the bushings. I think that one is the highest stress (why OSSA when to a larger pin for 2015). My design has the pin back to original size so standard needle bearings with seal can fit in. Made in Ti rather than aluminium is should be more than strong enough.
That is just the first outfit I tried- I was hoping for a lower cost but that is the quote. If I got 5 sets, it would be cheaper. Steel was cheaper, but not hugely (I will price that out also).
These have lubrication fittings, to make daily servicing a LOT easier. Still no seals on any but the needle bearing, but I found if you can pump some grease through- it pushed most of the junk out of the bushing, making them last much longer.
Anyone really interested, let me know. But I suspect cost is too high for most. (I’ve broken a couple linkages, that is why I am considering it)
-
I am in NW Washington State- right across from Victoria, BC
-
Really need to have one to assure dimensions are correct.
-
I do not have one to model. I would certainly like to give it a go. If you have a damaged one you could send I could model and 3D print to verify dimensions.
I will know more when I get quote for costs of getting them made. May just be too much.
-
Thanks!
I do not have the machinery to make all these parts, and I’ve never machined Ti. I have made replacement ‘middle pin’ in aluminium, but not anything else. If I have the knee mill I want, I would give it a go.
So to save money, I will spend $10k or so - ha!
I may try making some other parts and perhaps the pin so I will contact the person.
-
I sent off the files to one company to get a quote in 4130 and Titanium. I will post up results.
The test fittings with 3D printed parts were good.
-
On my original 2014 Explorer (sold a couple years ago) I broke the suspension linkage a couple of times. I bought some Titanium ones and they were great (with lube fittings). But the company no longer makes them. I suspect they didn’t sell very many at all.
Since I like learning things and have been working on Fusion (3D CAD) I have been designing a new linkage. I am basing off 2015 links (larger main link) but going to change to needle bearings in the middle of the link, with lubrication passages. The other ones would be a lot more difficult to change from the bushings, but I can still put lube passages.
I have 3D printed the parts so I can test fit and make sure I got dimensions correct. Measuring/comparing to stock- I think I’m right on. The Ti ones I bought all the fittings to grease, I used to do so after every ride since there were no seals at all and the new grease would help push out contaminates. The needle berarings I found do have seals, so I will see about not doing it nearly as much if they really are effective.
I can get them made out of any material I want- just a matter of cost. Once I have verified all is how I want, I will send the CAD files to a couple manufactures and get prices. I expect a good steel would be a LOT cheaper than titanium, and while heavier, most still quite a lot stronger than the stock aluminium parts.
It has been a fun project so far- I will keep posting as it moves along.
-
I can understand that. I just seem to like the ‘oddball’ bikes.
I have more to add to signature, but can’t remember where to change it and could not find it in a couple minutes.
-
Yes, they pump runs just a few seconds- once pressure is up it stops. The 9V will ‘wake up’ the ECU, so easier to start, but I think one that will make the pump run makes it a lot easier.
I have two Explorers right now, and I bought one new (sold later). I have a 2012 in the shop now doing a piston/cylinder plate and know of one other around. I think quite a few more than 10. I will see the old importer in a week or so, I will try to remember and ask if he can guess how many he brought in.
-
The twists and turns are tricky for the engine for certain. Another option for something that needs to be serviced would have been nice. At least the engine complete only weighs 36 lbs.
The cylinder can come off with engine in frame (I just did one)- but not super fun. The piston pin needs to be removed, taking piston and cylinder out together. Of course radiator, throttle body and airbox have to come out too. But those are pretty easy.
I installed a small 12v Li battery with a momentary button. My ‘super easy start’. Any time the button is pushed the fuel pump will run. Makes it a LOT easier to start. Plus good for priming if you run out of fuel, or trailside troubleshooting. I have had it on all my modern OSSAs.
-
I measured 50 psi with fuel pump running.
I have not measured current draw, but that can be very handy to see if fuel filter is plugged. Unfortunately, engine has to come out to replace filter (wish they would have made an access panel, but I understand difficulty in that).
Several places still have that cap- did you try Lewisport in the States? (I have a spare, but want to keep it as a spare)
-
I have used the fuel PUMP test to drain tank, check pressure and flow.
That works great.
-
Update:
I decided to do some testing on my 15, to verify what I’m seeing. And I found out that the injector does not ‘fire’ on mine in test mode either! Dang. Certainly surprises me, why have it if it won’t open it?
Anyway, bike runs great on my ECU- so after starting on mine, I put the 2012 one on my 15 (same unit) and it would start too. So there is something else going on and I wasted time by making assumptions on the diagnostic software tests.
I thought I would update if someone else does that and makes same mistake as me.
-
I did a bunch of testing today.
Finally found:
11.6Vdc at one side of injector whenever key is on (this early Explorer had battery and key)- and injector connected.
Injector works great if I earth the other side. BUT it appears the ECU is not suppling a good earth when running the injector diagnostics test. Hard to get a good reading, even with Oscilloscope. I measured a good earth to the ECU (assuming the black wire is earth, which is seems to be).
So I suspect failed ECU. Even the importer never could get wiring diagrams from the factory for the early Explorers, so some thing are just testing end to end.
Anyone have a spare working ECU? It appears to be the ‘later’ ECU type.
5200030212
|
|