It was perfect when I last used it but after standing for 12 months the bike is releasing boiling water from the radiator overflow and surges and dies when the throttle is opened up.
I've cleaned the carb and jets, the reed valve is fine, new correct spark plug, the fan kicks in and off and the exhaust is good. It starts very easily and ticks over perfect but when I use the bike it surges and dies but will tick over fine. After testing it three times twice it emitted coolant and once it did not but still died when opening the throttle when it got warm.
Any help is much appreciated!
Did you put absolutely fresh premix (no old premix whatsoever) in a flushed-out tank? Some mineral-based premix oils will cause carbon buildup in the exhaust headpipe, you might want to check. Exhaust restriction will cause overheating.
Thanks for all comments, greatly appreciated. Low speed throttle and 10T sprocket are currently installed. Sounds like a toss-up between the flywheel and the lower compression. I'll probably try the flywheel fix first as the bike is also used in no-stop vintage events. Yes, we allow modern bikes in our vintage events.
I think you'll like the flywheel weight, especially in no-stop conditions. By "storing" energy in the flywheel and using it, rather than more throttle, in iffy traction situations, you'll lose a lot fewer points as the power to the rear wheel is much more smooth.
Do you mean length or diameter? There is no way a 20 or 22mm diameter plunger will fit in the master cylinder. I think the others are correct about the bore being approximately 9.5 mm diameter. The length of 20 to 22mm makes more sense.
Unless the current plunger is completely seized you can probably remove the circlip and plunger and clean up the plunger and bore. It is fairly common for water and dirt to get inside the rubber boot causing rust which affects the operation of the plunger. A good cleaning will often fix most problems. If the rubber seals need to be replaced it might be better to get the rebuild kit that includes the plunger, seal, spring and boot.
He said "plunger size", which makes me guess he means bore diameter but there may be other measurements I'm unaware of. The 20/22mm measurement may be circlip stop to effective piston seal area rather than plunger length. A longer stop-to-seal measurement may not allow the seal to retract back far enough to clear the orifice connecting the reservoir to the bore, effectively resulting in a "closed system" unable to "self adjust" (like what happens when the lever adjustment is screwed in too far).
I'm guessing he needs the #BT27722208 kit (9.5mm bore, DOT-4) that fits the 97'-04' clutch/brake MCs.
Does anyone know what the plunger size is for a 1997 gas gas jtx 250 to go inside the front brake master cylinder? A place that does them sells them in 20mm and 22mm variations.
Generally, 9.5mm. The 20/22mm is probably for a larger vehicle.
Head gasket on my 250 is copper, so no problem reusing it.
Guy
Head gasket on 350 is also copper. Should be annealed before re-use, heat to cherry red and let cool on it's own. It will then conform to irregularities upon installation.
Looks good! As with any used bike, assume that nothing has ever been serviced and take the time to go through every part (bearings especially) for lube and adjustment. It will pay off in more riding time and less fixing time. Don't be afraid to ask questions, as you can see by this forum, we are a helpful group in general and here you have access to experience from, literally, all over the World.
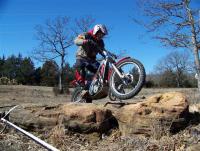
97' JTX is a good bike to start with. Strong and handles well. As with most Trials bikes, with care it will be reliable. Here in the U.S., it's almost impossible to ever find a Trials bike in a cycle wrecking yard. Welcome to the gang.
3 4 & 5 are similiar enough as far as I know, I think it was mineral oil that used to eat the seals on tophat, that you "shouldn't" be able to get anymore? AKA updated.
I do my darnedest to not mix, but even in a pinch (aka temporary) I have had to use 5 in a normally full of 3 or 4, now everything on my bike is 5. less crap to have in your toolkit.
Mitch,
3, 4 and 5.1 are essentially the same (5.1 is a lighter viscosity, common to European high-speed ABS systems) but they are very different from DOT-5, which is a Silicone based fluid. The DOT-5 is common to military vehicle brake systems due to it being much less hygroscopic (an ability to attract and retain atmospheric moisture, yes, spelled with a "g") so storage is less of a problem and it lacks the strong solvent properties of the 3/4/5.1 type. It does, however, make the brakes feel "spongy" due to it's minimal compressability, so you will probably never see it used in racing brake systems.
You can use mineral oil in a clutch system but should never use it in brake systems due to it's low boiling temp. Mineral oil, DOT-3/4/5.1 and DOT-5 are not compatable so they should not be mixed unless you want gundge in the system or desire to replace the mineral oil seals/o-rings that have been damaged by the solvent properties of DOT-3/4/5.1.
Jon
An exerpt from one of my answers to a question a rider sent me:
It’s hard to imagine a subject duller than brake fluid, but it’s something we have contact with just about every day, directly or indirectly. Most of the time we could care less about it, but in Trials, it’s a very important material and just about all Trials bikes have three separate systems that employ brake fluid to transfer motion that make us both go and stop. Hopefully, the result of that going and stopping is dependent on years of hard earned Trials experience and razor-sharp athletic prowess, rather than an immovable object such as a tree, which is usually what happens in my case.
I like to change brake fluid about every six months when possible. It has an effect on how the controls “feel” and fresh fluid will prevent corrosion caused by water buildup in the calipers and cylinders. The polyglycol based brake fluid (DOT 3, 4 and 5.1, as opposed to the Silicone based fluid which is DOT 5) is what is called a “humectant” in Chemistry, meaning that it promotes the acquisition and retention of water. Glycol is an alcohol derivative and alcohol is the main component of gasoline additives that are designed to drive water from the fuel systems of automobiles. Polyglycol and Silicone are used in brake systems rather than another fluid, such as water, because it stays relatively consistent in viscosity from cold to hot, has a very high boiling point and provides good lubricating qualities for the various parts.
Water will get into your brake and clutch systems in a variety of ways, usually from a brake fluid container that has been opened for a while, or past the venting diaphragm under the master cylinder cap. It will collect in the lowest part of the system, usually the caliper assembly, where it will corrode the alloy components and rapidly degrade braking ability. Flushing it out when you change fluid is the only way to remove it. I like to slightly overfill the master cylinder reservoir when replacing the cap so as to minimize the amount of air (and water vapor) under the separation bladder the cap rests on. The water absorption problem is so important that some manufacturers of high level racing fluids recommend that the brake systems of racecars be bled before each racing event, particularly in wet or humid conditions.
Another of the big differences between the glycol-based DOT-3, DOT-4 and DOT-5.1 fluids is the wet and dry boiling point. The “wet” boiling point is tested with a 3% water addition to volume. DOT-5.1 brake fluid was designed to be used in European automotive high-speed ABS systems. It has the lowest viscosity of the glycol-based fluids.
DOT-5 is a different kind of animal altogether, and has a Silicone (Silicum-based Polymer) rather than a glycol (Polyalkylene Glycol Ether) base. One of the nice things about it is that it doesn’t eat the paint off your bike like the glycol-based stuff does. I like to use it in my clutch because it tends to smooth out the action and I like the “feel”. If you wanted a “quicker” action to the clutch, you might want to use the DOT 5.1 type due to its lower viscosity. The Silicone-based fluid doesn’t “absorb” water like the glycol-based types. The water will separate out as globules and can still cause problems if not flushed out on a regular basis.
Although it would seem that all the fluids should be able to be mixed, especially the DOT 5 ratings, such is not the case. DOT 3, 4 and 5.1 (amber or clear in color) can be mixed, but DOT 5 should never be added to anything other than itself. It is a chemically different compound, being Silicone based, and will give a cloudy mixture that looks like Jell-O when added to the glycol based fluids. Silicone DOT 5 is a purple color (by DOT rules) so it won’t be confused with the other types. Some racing brake fluid can only be mixed with itself and won’t mix with any other brand, such as AP600 (designed for the carbon-carbon brake systems of F-1 cars). If you feel rich, you can get some Castrol SRF brake fluid, but it will set you back over $80 a liter, a little less than a quart.
Buy fluid in small containers that will be used quicker. Never reuse fluid that has been drained and keep the caps tight on the containers to prevent moisture contamination. Remember, it’s a LOT cheaper to flush brake fluid a couple times a year than buy new components.
the bike need to be laid on its side, when you take off and or replace the clutch side cover. I cant see how the fluid would NOT come out, you when you pull that top-hat off. at least some. Easiest way to refil, if you have help is the push fluid into nipple on clutch slave, until it fill tank on bars, problem is small little hole in tank and will cover the ceiling in fluid when you push into empty tank, so I lay a clean tank cover over the tank, maybe put tiny amount into empty tank before you start pushing up from slave, ya know. gets 99.998 of the air out that way.
Be sure to watch for falling parts, you know bearing and washer/race on clutch, thin shim on start shaft. they have a tendency, to hang onto the cover just for mere seconds due to oil film, then fall when you are NOT looking!
I like to fill the top hat with fluid before installing on the post. This way you avoid the air pocket at the back of the servo cylinder problem. Be sure to fill the reservoir only about 1/2 way full, it does not vent the same way as the reservoirs on the bars.
Clean fluid is a good lube, as Sting says. You can also use a very light coating of Silicone grease (VERY light, you should only see gloss, not chunks). If you wanted a smoother clutch, you could change to DOT-5 (Silicone), which, unlike DOT-3/4/5.1, is slightly compressable. DOT-5 is compatable with all the seals.
Hi i have a 2010 gasser 300 racing model with the ohlins rear shock. Could anyone tell me what the standard settings are for spring length and for damping. I presume that when its been rebuilt it was put back to standard settings but just when to check
Thanks
Coxy
Coxy,
Technically, there are no "standard" settings as each shock should be adjusted to the individual rider's weight, riding style and preference (this is why they are adjustable, like a carb's fuel/air screw setting). A professional suspension shop will have recorded all the critical settings and measurements before dis-assembly and will have reset the shock back to those specific settings before returning it back to the owner.
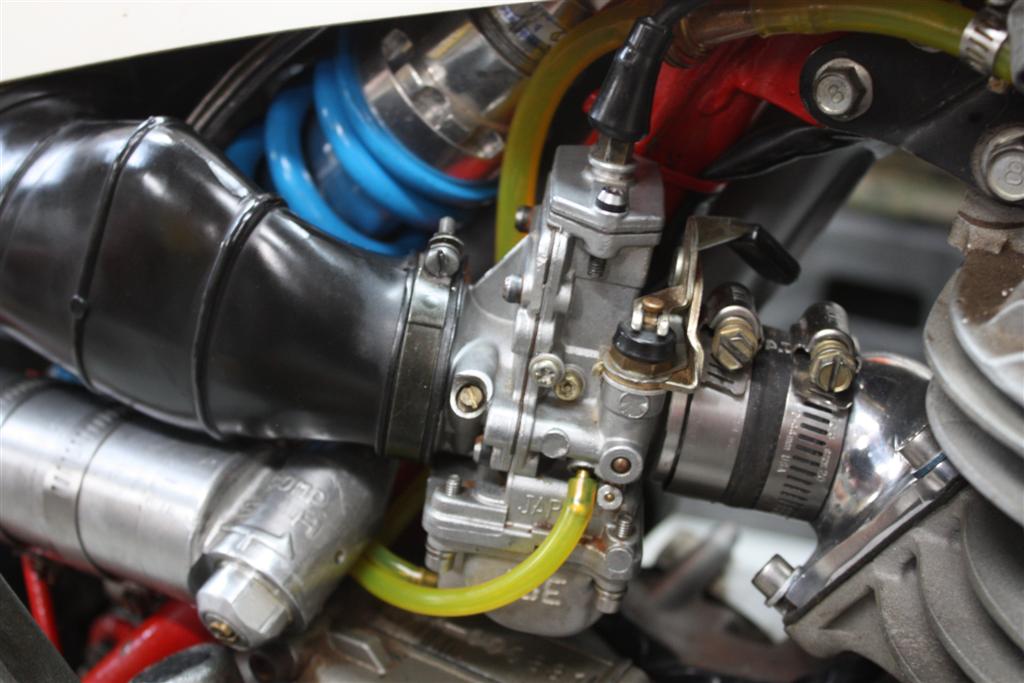
Jon , Nice detail work ....Make the carb fit the bike , not make the bike fit the carb ...!
Glenn
Glenn,
The extended spigot is so that the end of the carb spigot mates up against the special one-piece manifold/reed block. This way there is no "gap" inside the tubing between the end of the carb spigot and the beginning of the manifold spigot, which would form an "expansion chamber" of sorts inside the tubing. You want the cross section area of the intake from the needle jet to where the fuel/air column starts to expand into the area under the reeds to remain as uniform as possible. Any area variation will tend to degrade the air column "signal" at the needle jet orifice.
The reason that flat slides work well and are so responsive is that the air column is not "split" around either side of the cylinderical slide (right at the area of the needle jet where it's most needed) but is concentrated over the needle jet, thereby vastly improving the pressure/vacuum "signal".
jse: is that a piece of radiator or fuel filler neck hose used as a spacer/intake tube for the carb?
Jontow,
That is fuel-proof reinforced tubing. What you can't see (except for the "ring") is the machined spigot extention I installed that fits down inside the tubing.
ive ordered the 40. 52 10.5 not the "52.2" been told there is no such size or it won't make a difference? Anyone else had this issue?
Also when i removed the original, it was a hell of a job? as they both seemed like they were very tightly fitted against the cast of the fork??? I did remove them but i nearly destroyed them when removing????? For future reference...Is there a proper way of taking them out?
A little careful heat from a propane torch or a heat gun will break the bond and the seals will come out a lot easier. I always use a torch with no problem but some are afraid of burning something, never have.
It's looking like I might finally get it fixed this week.
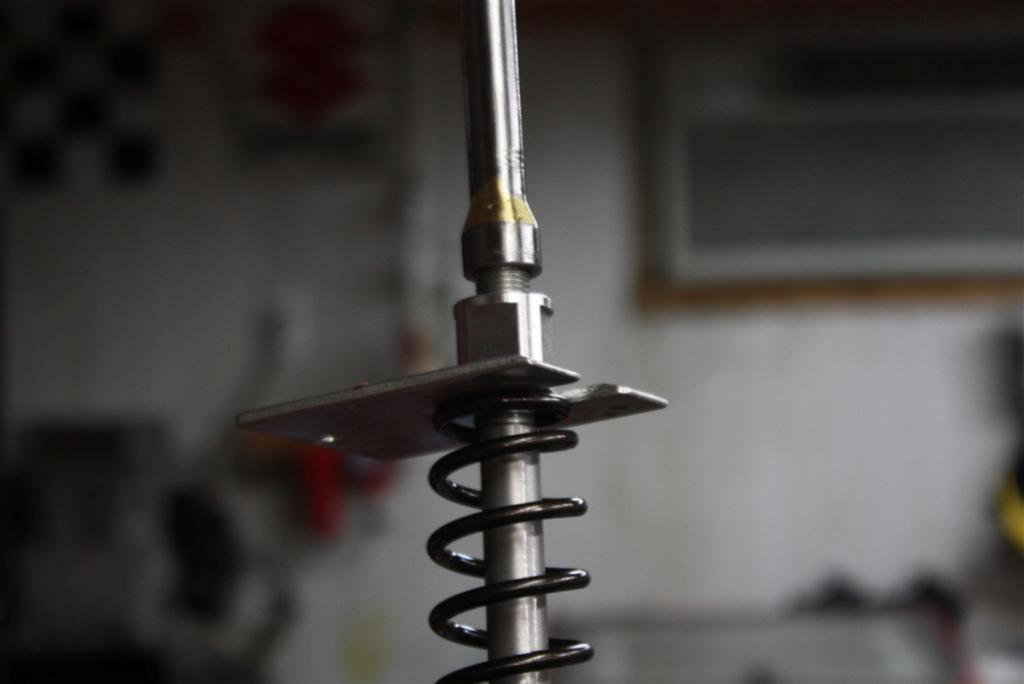
I couldn't source a new original or alternative spring. The used one bilks very kindly sent me unfortunately turned out to have a small crack, only really visible when compressed but I don't think it would have lasted long. I decided to have two made, the first two attempts were found to have defects in the wire - they're now making another pair which should be shipped this week.
Owned it since April, ridden it for 5 hours :-(
Parts availability is my number one priority for whatever bike I buy next. Although this one will be a half decent bike again before I'm finished with it.
It's been that long that I've now forgot how much oil each leg holds so I'll have to research that again.
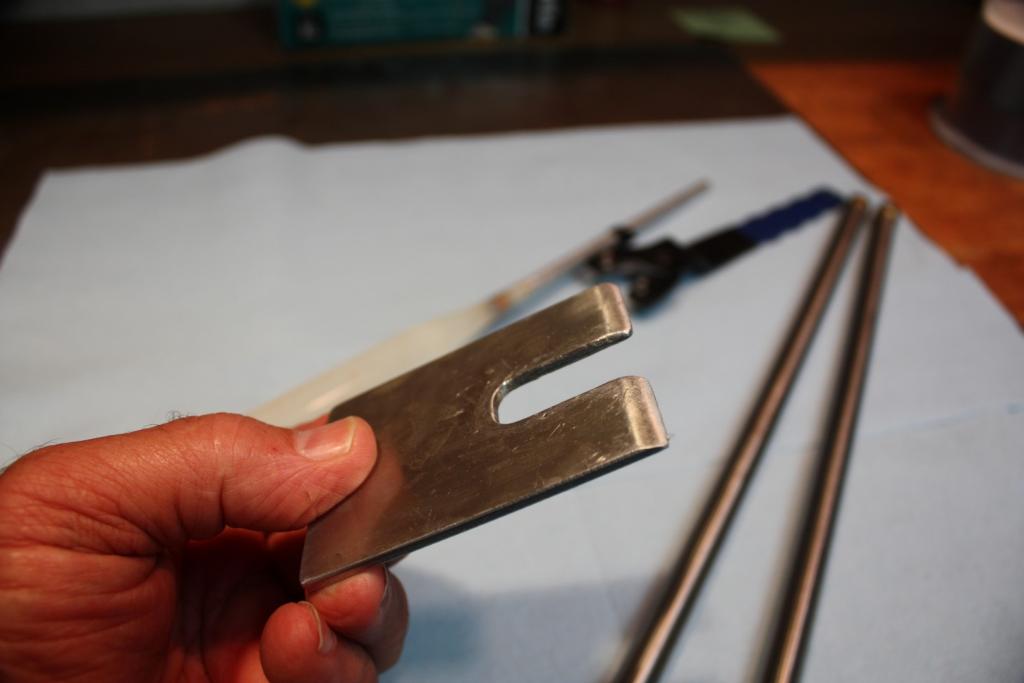
Here's a simple tool to help with the top cap removal/re-installation. Each leg takes 300cc's of 5-weight fork oil.
Jon
ps. Almost forgot. That top cap only is tightened to barely snug. It's held tight by the upper tripleclamp and the oil seal is by the o-ring, not how tight you torque it down.
Near 1 mm up and down play in conrod almost certainly means big end bearing has gone. Whatever ha caused this probably means main bearings are on their way out as well.
What fuel and oil do you use and what mix ratio?
ANY up/down movement of con-rod is cause to replace. With this extensive engine damage, I'd guess dirt sucked past the air filter or foam filter not oiled.
yesterday i recieved my new bearing, gaskets and so on.
but when i installed the two half bearings of the 5. and 6. gear, the gear doesn´t spin free
i´m a bit worried about that because if there is no gear at the bearings, they spin free and if i put the bearings in the gear, it does also spin free
maybe you have some tips for me
i´ll add a video i made
greets
Dani
Dani,
I would carefully inspect the inner and outer surfaces that contact the bearing needles (they are actually the inner and outer "races" of the bearing). They may be damaged. If so, those parts also need to be replaced.
Sorry Jon..they are stock 1.5mm plates.....moot point though ..according to Rising Sun Imports the thinner plates are no longer made..so I had to order a new pack..should be here in a few days.
With my enduro bikes I was told to soak the new fiber plates in gear oil for a few hours before I install...same here?
Gotcha. The new pack will undoubtedly have the two 2.0mm steel plates. There are two fiber plates the same thickness and the third fiber is the one used to set the pack width at the factory. That thicker fiber plate always goes in the clutch basket first. It's usually a drop-in affair but you may want to measure and record the finger height just to have as a baseline. I like to soak the fibers for a short time, mostly out of old habit. Save the old clutch, it can come in handy for parts sometime.
Found my problem...pulled the clutch out and the finger height is 12.75 mm and clutch pack is 10.2...now putting in 2 - 1.3mm metal plates will get me to back to spec at 9.8 on the clutch pack
I'm assuming that will put the finger height somewhere back in spec...correct?...I was considering getting the 2 -1.3 mm plates and one 1.4 mm just in case...
I don't remember seeing what your plates measured out as to start with. If it's an earlier clutch pack, you could have a number of thickness' plates. If it's been replaced with a newer pack, both plates will measure 2.0, and you will then end up with an 8.8mm pack, which will not work.
What is the thickness of the installed plates in your old clutch?
I couldn't find a heat shield when I was building my bike, so I made my own, It was very time consuming, so if you can find one already made up, I would definitely recommend it.
Regards,
Gary
Gary,
The whole bike is a work of art. I know from experience how much effort went into it. Well done.
Thanks for the tips. I have an unopened 7wt oil sitting around, so I'll give that a try. I'll keep looking online for replacement shock, but in reality, this is just a starter bike for me and I don't want to invest too much. Once I get it detailed and functioning optimally, I'll trade up to something newer next season.
Check with Jim Snell. They may have some reasonably priced aftermarket shocks.
The problem you have is not unusual as the adjustment screws are fairly delicate on shocks (all shocks) and riders will force them when bottomed out. Kinda like the top caps on forks where riders think tighter is better when they should only be just snug.


Help! Txt Pro 250 2006 Overheating And Poor Running
in Gas Gas
Posted · Edited by jse
Did you put absolutely fresh premix (no old premix whatsoever) in a flushed-out tank? Some mineral-based premix oils will cause carbon buildup in the exhaust headpipe, you might want to check. Exhaust restriction will cause overheating.
Jon