L'épaisseur du pack d'embrayage affectera la difficulté ou la facilité de traction de l'embrayage. La hauteur du "doigt" change à mesure que les plaques s'usent et peut modifier la sensation de traction de l'embrayage. Le pack d'embrayage pour 2004 Pro devrait mesurer 9,75 - 9,85 mm. la hauteur du "doigt" doit mesurer 17mm +/- 1mm. Je pense que la hauteur des "doigts" est plus importante. Le ressort rond doit mesurer entre 4,4 et 4,5 mm d'épaisseur.
L'image ci-dessous provient de The Hell Team in Australia
Si vous avez besoin d'ajuster l'épaisseur du pack d'embrayage, de nouvelles plaques de fibre peuvent être achetées ou différentes épaisseurs de plaques métalliques peuvent être achetées. Ils sont empilés dans diverses combinaisons pour atteindre l'épaisseur correcte. Exemples en lien ci-dessous.
À un moment donné, des plaques de pression d'embrayage plus minces (ressorts) pouvaient provenir de fournisseurs de pièces de rechange. Je ne sais pas s'ils sont encore disponibles
I don't know if the Brak-Tec caliper on my GasGas is the same as yours but here goes.
I have a 4 piston mono block caliper. I decided to clean the pistons and reassemble
I did it one piston at a time. NOTE: I did not remove the large Torx plugs in the caliper.
1. disconnect brake hose from caliper - drain as much brake out of the caliper as you can, some will remain
2. wrap mechanics wire around the 3 pistons you want to stay in the caliper
3. using compressed air "pop" the 4th non-wired piston out
4. At this point I cleaned the piston and reassembled, you would pull the seal out of the caliper with a pick. Lube the new seal (I just use brake fluid), insert new seal. Lube new piston, insert new piston.
5. wrap mechanics wire around the new piston, unwire next piston to be changed.
The good news is that I've found a wheel builder in the UK that's doing some vintage tubeless wheel builds for me and my son that has extensive knowledge of these type wheels. Have messaged him and have an initial response with his willingness to virtually help me get it back together.
Thanks. Been out cutting dead limbs all day on my property out of my manlift, so have no patience or energy to try to tackle it tonight. At best, I might put some antisieze on all the threads.
If you come up with a better process for lacing these types of rims, Please share the info.
I recently replaced 7 bent spokes on that style of rim, disassembled, reassembled, etc.
Much cursing and swearing, sorry don't have a trick other than patience. but there is a point in the "length" of the spoke where the hub side is past the bend in the spoke but not touching the end stop of the spoke. This allows a little room to slide back and forth a little bit. I did have to do a little forcing to get spokes started in the turnbuckle.
I tried to start both spokes in the turnbuckle at the same time, so that one end would not bottom out before the other and have maximum adjustment available.
thanks, I know there is one diagnostic cable but besides this one, I got 2 free left - 1 single wire and second dual wire plug. Both near the regulator.
I popped the fuel tank off and poked around a bit. I have not owned this bike long or did too much maintenance on it due to multiple injuries. (yes I am making excuses and whining)
I did not see any unconnected plugs under the gas tank. There is quite the mess of wires under there.
I must have been thinking about the 2003 when I mentioned two plugs not connected.
My 2015 was produced prior to KTM buying GasGas, the 2022's are made after KTM bought GasGas. So there is a possibility of differences in wiring etc.
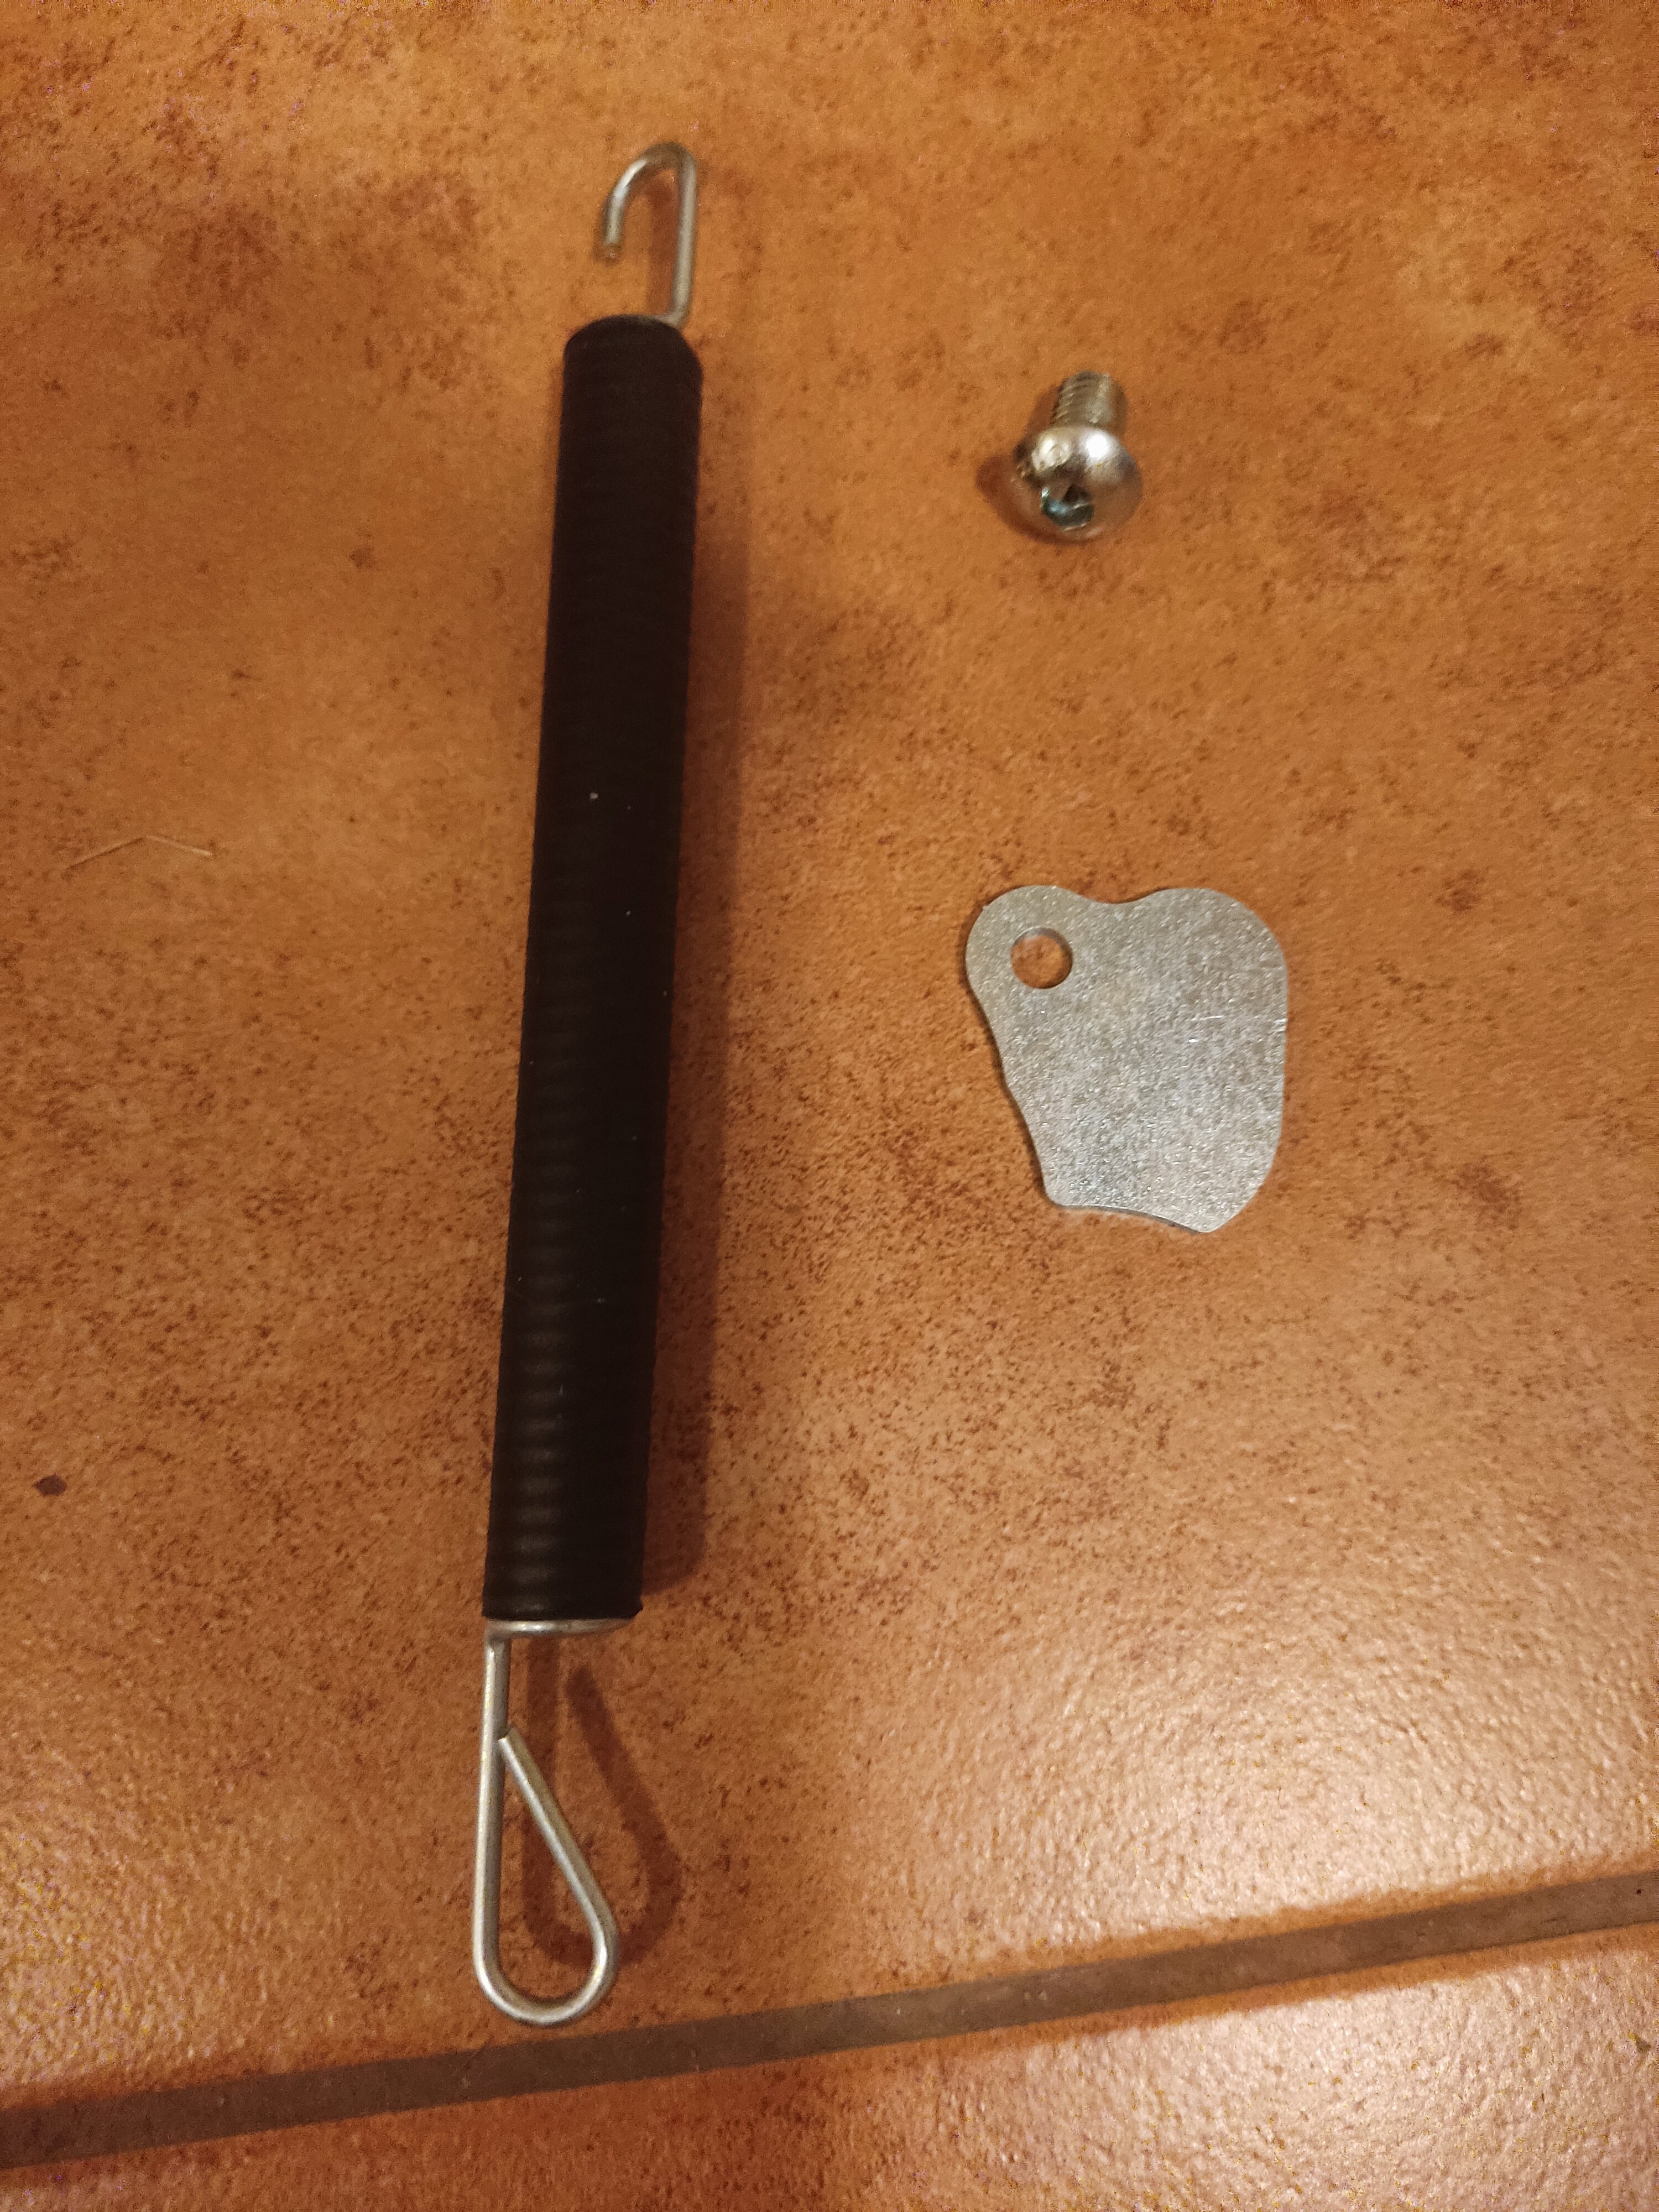
Yes, you are right, that's the cover plate for key lock in triple clamp thanks
Side stand is working now properly, need to replace also on ebolt provider cause longer spring was rubbing on.
BTW looks like you have same bike, do you remember were there any free hanging wires/plugs under the tank. near the regulator?
I am almost done with setup and ready to fire it up but not sure about two plugs which are not connected anywhere.
You're welcome.
I do have a 2015 GasGas 300 Race, the photo I pulled off the interwebs is of a 2022.
But they should be very very similar. I purchased mine used, so it was all set up for competition, none of those extra blinkers etc.
I will try to remember to look under the tank tomorrow, if I remember correctly there are 2 plugs that are not connected to anything. I will try to confirm.
no, this plate came along in one bag with spring and bolt for side stand.
Just take a second look at the lower triple clamp, throttle side. The 3 parts may have been packaged together for convenience, not necessarily for install location.
I have one on my 2015, my previous 2003 had the hole in the clamp and a hole for the bolt but the plate was not installed.
Thanks, looks like in the drawing but cannot identify that smal steel plate with one hole, it was in the package along with spring and the bolt
pic below, what is it for?
Take a look at the bottom triple clamp. there may be a locking mechanism for locking the forks in place. A type of theft deterrent. I think that plate replaces the locking mechanism.
Personal preference is to cover the clutch always 100%
I cover the front brake almost always, similar to Faussy if I am hitting a larger obstacle or hill that requires a bit more throttle and GO!!!! I will take my finger off the front brake.
As fprintf states, eventually the movements to get fingers back on front brake get to be almost automatic.
The forum was sold to a company that has a reputation for destroying the user experience of forums, in order to get more ad revenue. Nothing has happened yet, some think we have a year, other think it will be less than a month.
I was unaware of the sale.
but to be fair there is much I am unaware of in life.
Clean the bike???? oh no no no. every time I clean the bike something is broken.
No clean the bike = nothing broken.
I transport my bike(s) either in the bed of a pickup or on a trailer. So I never really thought about a need to clean the bike before transport, but I can see in certain cases where it would be a concern.
Have you considered a hitch mounted carrier? (assuming your vehicle will accept one)
I believe it is a designed "weep hole" to indicate failing water pump seal(s) as stated by b40rt and tshock250
If I remember correctly that is a 2 seal design, a seal for the coolant side and a seal for the oil side with a gap between. The weep hole is situated in the gap between the seals.
Benefit is you can tell which seal is bad by what is leaking out of the weep hole. but I would suggest changing both seals, because they have both been in there the same length of time with same use etc..


Souplesse levier embrayage
in Gas Gas
Posted
L'épaisseur du pack d'embrayage affectera la difficulté ou la facilité de traction de l'embrayage. La hauteur du "doigt" change à mesure que les plaques s'usent et peut modifier la sensation de traction de l'embrayage. Le pack d'embrayage pour 2004 Pro devrait mesurer 9,75 - 9,85 mm. la hauteur du "doigt" doit mesurer 17mm +/- 1mm. Je pense que la hauteur des "doigts" est plus importante. Le ressort rond doit mesurer entre 4,4 et 4,5 mm d'épaisseur.
L'image ci-dessous provient de The Hell Team in Australia
Divers manuels et livres de pièces https://www.thehellteam.com/technical-support/gas-gas-parts-and-service-manuals
2004 Manuel d'utilisation du GasGas Pro https://drive.google.com/drive/folders/1-4IwVfa6L0JeJxakfxESxU6iZ7GNBelQ
Si vous avez besoin d'ajuster l'épaisseur du pack d'embrayage, de nouvelles plaques de fibre peuvent être achetées ou différentes épaisseurs de plaques métalliques peuvent être achetées. Ils sont empilés dans diverses combinaisons pour atteindre l'épaisseur correcte. Exemples en lien ci-dessous.
https://www.thehellteam.com/products/engine-parts/clutch-plates/?cn=106&rf=cn
À un moment donné, des plaques de pression d'embrayage plus minces (ressorts) pouvaient provenir de fournisseurs de pièces de rechange. Je ne sais pas s'ils sont encore disponibles