I would be more inclined to remove from the face. Obviously that affects the moment arm of inertia. I have the weight seperated. I will probably take it to one of the most natural trials riders I have met who quit the sport to build huge pulling trucks. If your ever in Detroit I will show you the shop.
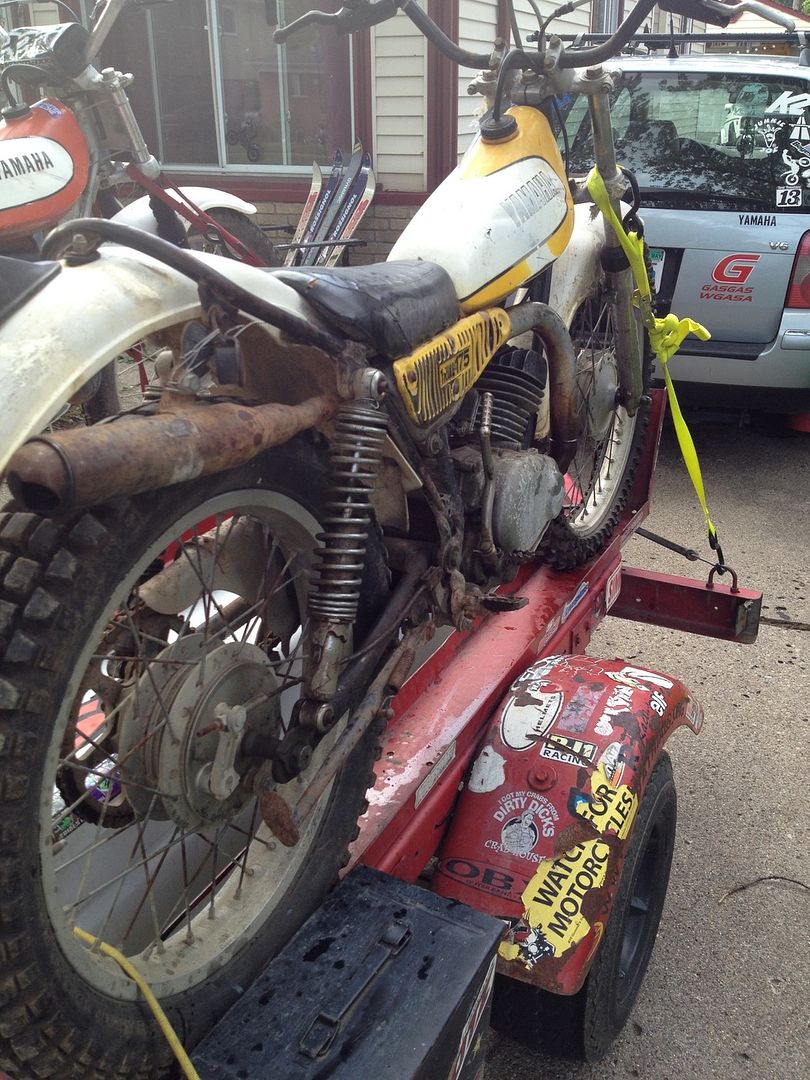
Biff I have 3 flywheels that I had been experimenting with, stock about 6.25 lbs a 5 lbs one and one around 4 lbs. I've have been using the 4 lbs one and will not go back the the others. The bike I rode at the Nebraska National had the light flywheel on it, the bike doesn't stall and idles smooth.I'm still using points with the condensor mounted under the tank ,the cylinder has been ported and the squish is tighter. I should have let you ride it at the national you would have liked it.
That's what I am looking for. Thanks!
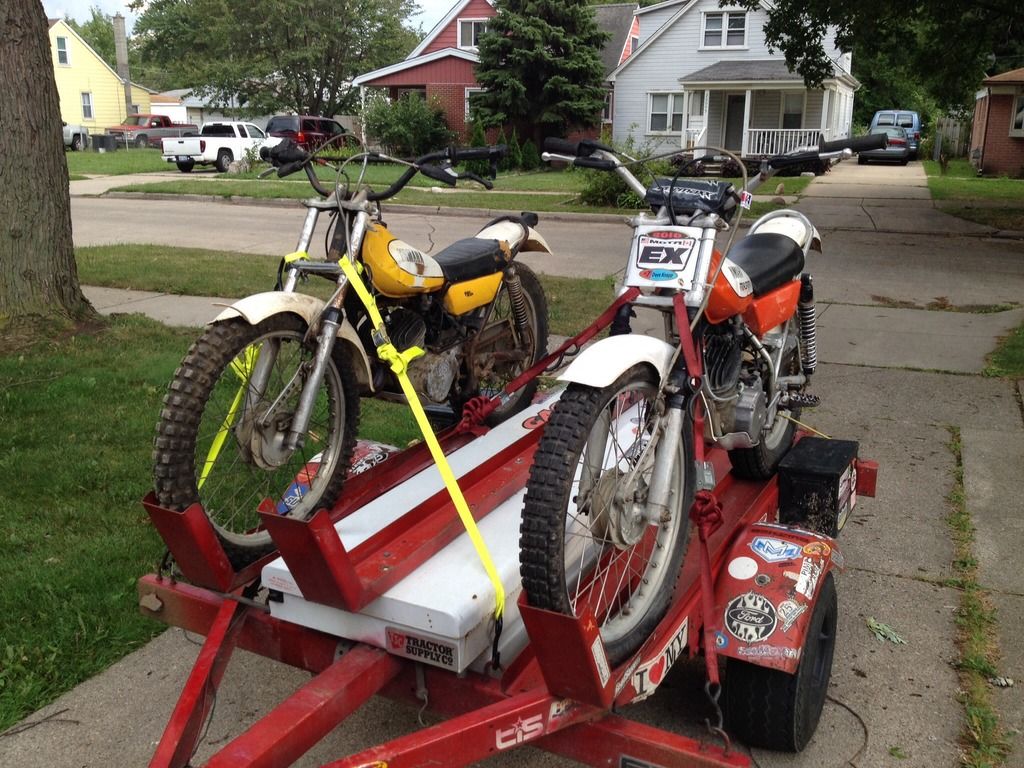
I have three whole bikes in the house now and I have some room to play with them. Thanks for the info! Next time sir. I will not let you ride off with out me trying
Yea I am very familiar with the purpose of the flywheel and the items that you are pointing out.
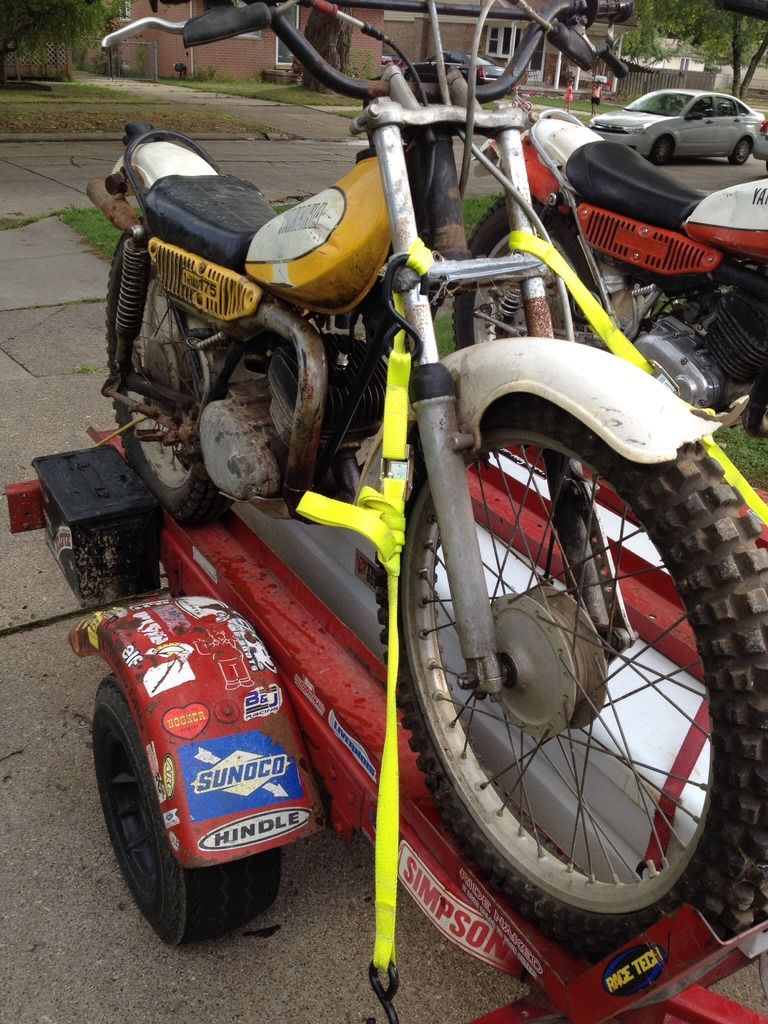
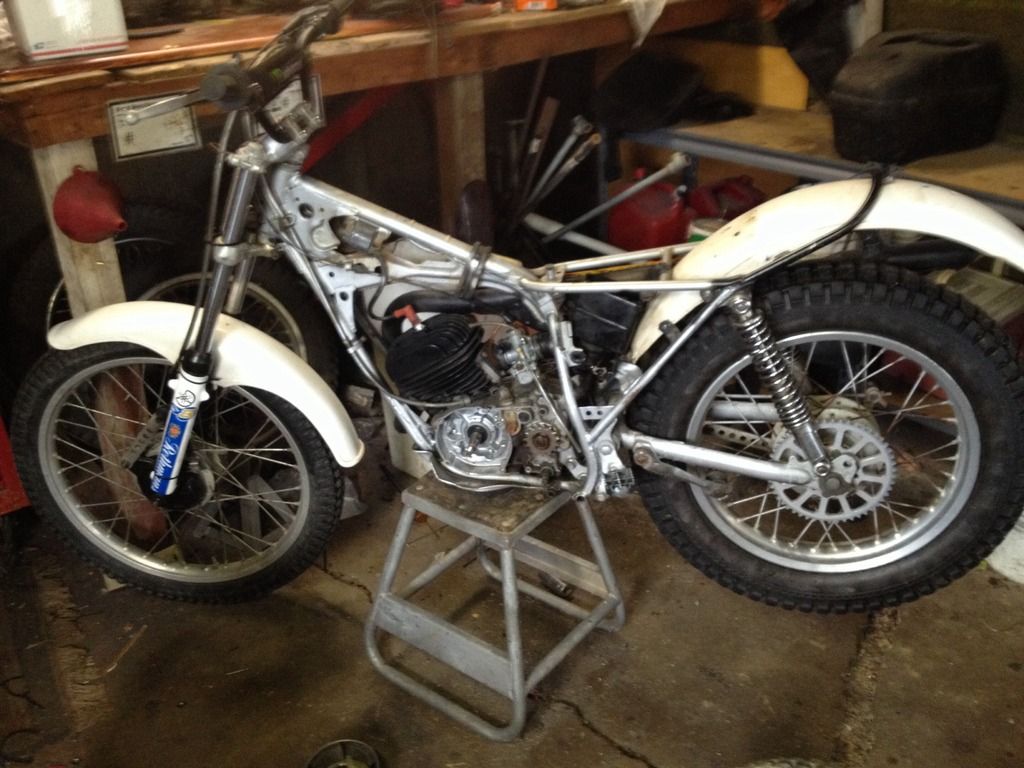
So my plan is to install boysens and a pwk24 flatslide. I will mildly port the engine and measure the squish. I don't think i want to remove much. Maybe none at all.
FYI most F1 engines have nothing but a clutch in the way of a flywheel. I feel that the ty175 is over weighted however i also love how that lil engine can chug so my head is looking for what that balance is.
So I have been told to shave down the ty175 flywheel weight. Then i have been told to remove it. Then told to not touch it. So what has been done out there?
Biff old chap. Can you make a silicon mold of Dadof2 head for us?
So i just ran through the 50 or so answers for this in my head. None of them make me feel like a good person. Not sure if I really want to start my Monday off that way.
Tremendous I hope it works. I too dont trust or want others to do work I can manage. The use of the silicon has potential for quite a few jobs, where can I buy oomoo 30 (great name) or are there other makes?
Art supply stores is where i can find it here. Its a 2 part 50/50 mix and takes about 12 hours to harden. Here in the states 2 pints cost me $26. There are plenty of others around but this is accessible for me and has a 30 min pot life so if I want to cast a mold of something i have time with some leftovers.
My second mold there was for that little lever that falls off of the gasgas petcock. I took a new lever off of a petcock and now if i lose mine i have the ability to make extras. Saves me from buying a new petcock each time.
Silicone doesn't seem to stick to anything other than silicone. I use a mix of fiberglass resin and carbon fiber to make parts.
You will be dreaming about that day and those rides for years. Coming from New York myself and riding in D4 and 3D as a kid/teen and now in the mid west i can tell you that its that way everywhere. Terrain is different but people are the same and the fun factor is equal.
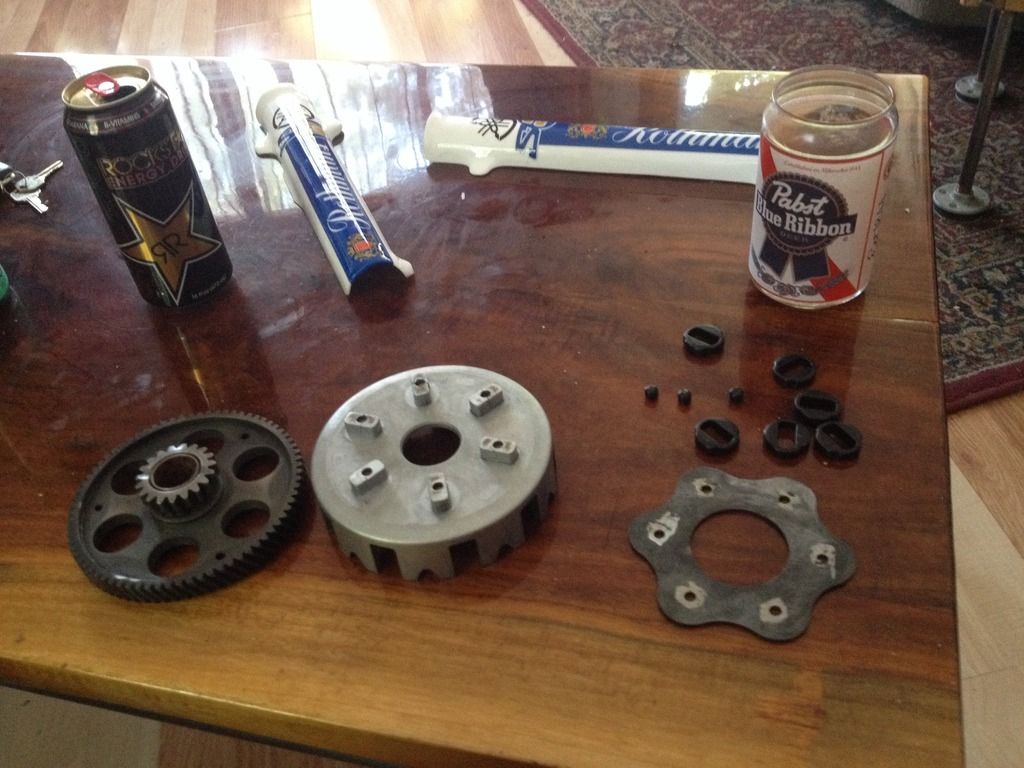
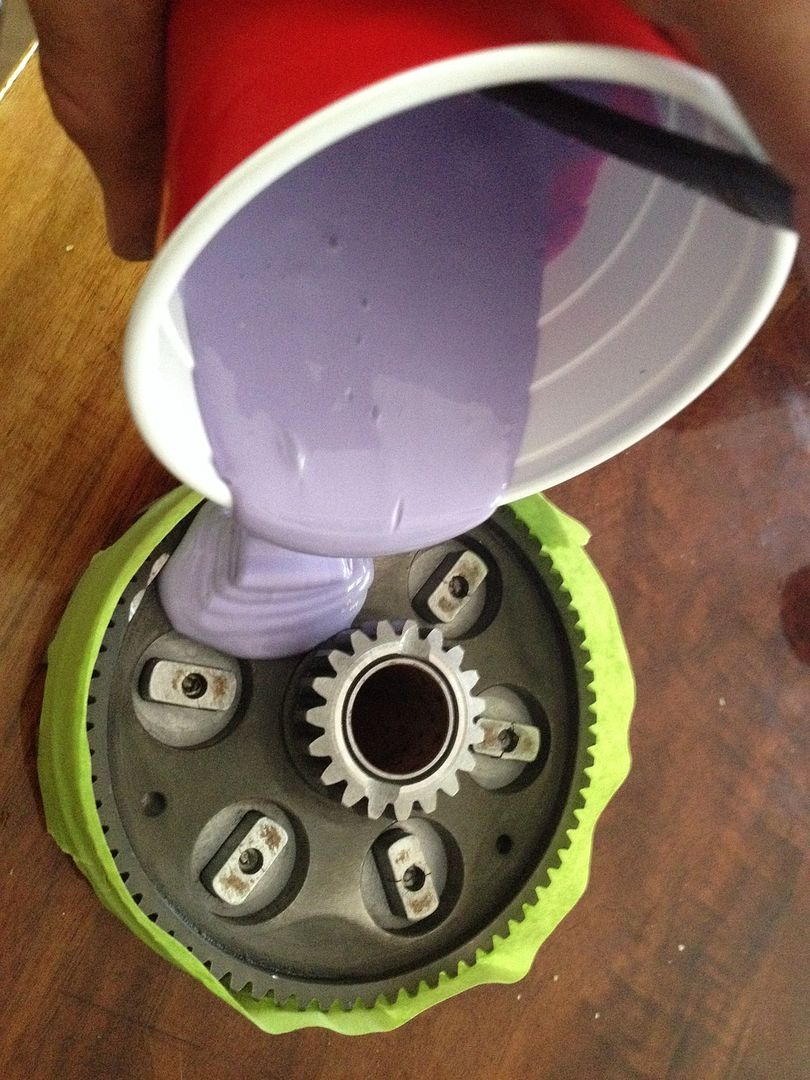
As in many clutch baskets there are rubber bushings with in that help with the engagement. Well one of my TY's has had a pretty loose clutch basket. I have searched high and low for a rebuild but alas I could not find anything. Never to be deterred by a challenge I decided to give this idea a go. I can't vouch for its durability but here goes nothing.
Preface: I silicone mold parts. I can't stand paying someone for something i can do myself. With that being stated I decided to try silicone molding my own customer bushings in the clutch basket.
Step one:
I cut off the heads of the rivets that hold the clutch basket together and pushed them part way through the clutch basket to disassemble. Grabbed a PBR and went to town. I left the rivets in partially because I knew that i would be using that as part of the mold.
Then I put the clutch gear back onto the basket. and used some masking tape around the base of the basket for any overflow. You will notice the cracks on the basket. That's because I don't think I removed enough of the rivet. Woops. They are shallow cracks so i should be ok.
Next I mixed up my favorite silicone mold making material. oomoo 30.
Then I poured it in not worrying too much about over flow.
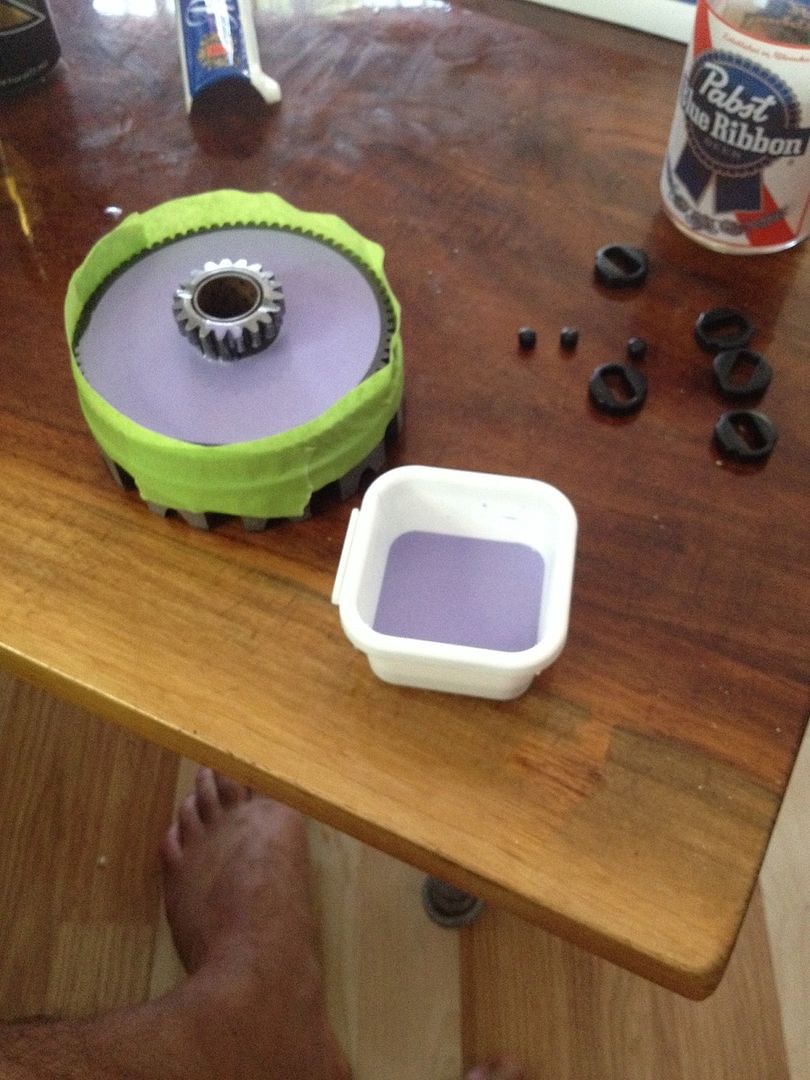
Sipped some more PBR and let it settle. I had a few other parts to mold and some left over silicone so I took care of that too.
I then drank several more PBR and went to bed.
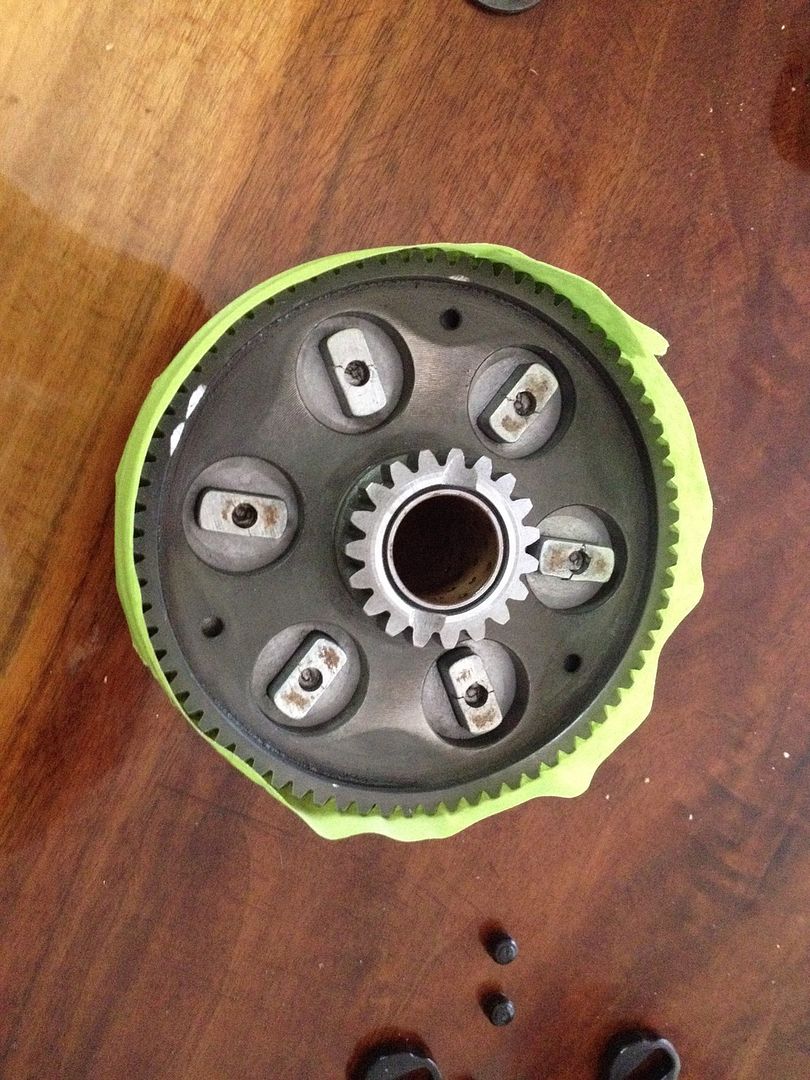
The next morning woke up to a predictably hardened silicone piece. I cut the individual bushings with a blade and wala there you have DIY bushings.
So removed the silicone piece and cut away my bushings. Then I pushed the rivets the rest of the way out.
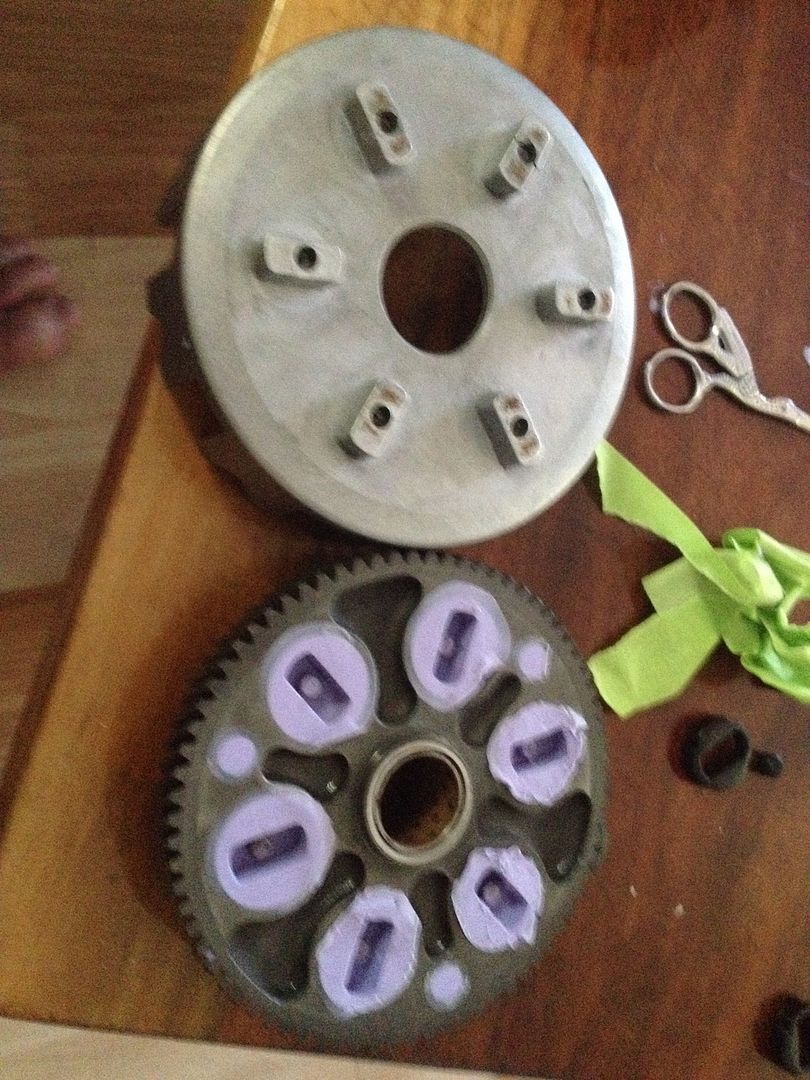
I reused the little rubber bushings and there you have it.
The bike is back together now all sorted from vintage days and much riding. The basket feels tighter but we shall see how it lasts.
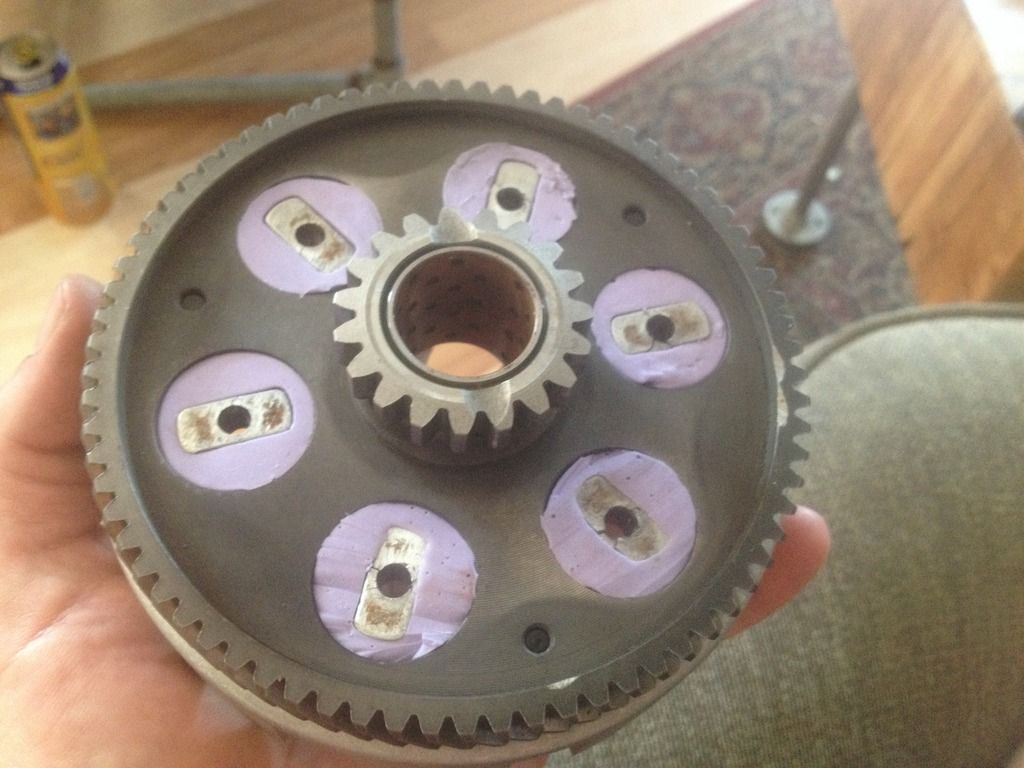
Questions that I have are. Will it last? Is it heat resistant? I am confident that it can take the oil no problem because i have used silicone in other areas similar to this. Will it take the shock? dunno....
Worst case scenario is I go back to the orignal bushings with some sort of modification to those.
She was soooo stoked during the awards ceremony. I believe she's on here. That bike is 15 times prettier in person. A buddy of mine asked her how old she was during the awards...k He might not be asked back...
That was a great weekend. AMA website has a bunch of photos of all of us.
jeroni is conservative and dibs pushes his boundaries. I have noticed James Dow in the ranks but I don't believe place makes you a great rider. He has his skill set. They both do. We all do. I'm a believer in that.
Its strange, when you go into cloths shop you expect to come out with a jacket that fits, buy a trial bike (or any motorcycle) and you get what the bike comes with
Its not strange.
I have never purchased a jacket with the understanding that it would get a new set of sleeves at some point.
I have purchased many a motorcycle knowing that there are certain wear items that will be replaced and I look forward to seeing if i can do it cheap with an added benefit.
It is strange to braze in some sort of plug at the bar end but who am I to judge.
Biff is right. I'm not paying $30/$40 more just because the bar says TRIALS on them. Can you tell the difference?
The main thing you need to look out for with MX bars is the amount of width between the bends. Trials bars have a lot more room up at the lever and grip area. MX bars seem to be bigger down by the triple tree clamps. Personally I think that's better for strength but it could just be me. The issue i have run into is when you cut down an MX bar you run the risk of running out of room for your master cylinders to clamp properly. I am using ODI chubs right now cut down about a half inch on each side.
Well the vent is there to release pressure. The oil level shouldn't be at the level of the vent but when you get a bit too much oil in there it is at that vent level and as pressure builds oil gets pushed out and not air. Of course you know that if you release the pressure at the fill plug it no longer pumps the oil out of the vent. If the oil level is growing then you have a water pump seal going bad but as you have said its not getting milky its staying proper colors. If you had a lower end crank seal or crank seal o-ring bad it generally would suck the oil from the case rather than pressurize the case.
One thing you can do if you want to get tricky. Add florescent dye to your crank case oil then run the bike hot. When you have your cylinder off use a black light to see if any dye shows up on your crank shaft. It shouldn't if your crank seal is good.
Another thing i wouldn't do is remove your cylinder head from the jug. Its no worth the hassle to get the o-rings back on your head if they aren't bad. Its a bit harder to remove the cylinder with the head on in the bike but it will come. Good luck.
375cc is all this case takes. If you have 450-500 it spit oil out of the breather.
There is no oil in the cylinder nor is there water in the block other than the water pump. Leaking base gasket will cause all sorts of fuel mixture issues. Fix the base gasket and make sure you have 375cc of oil in the lower end.


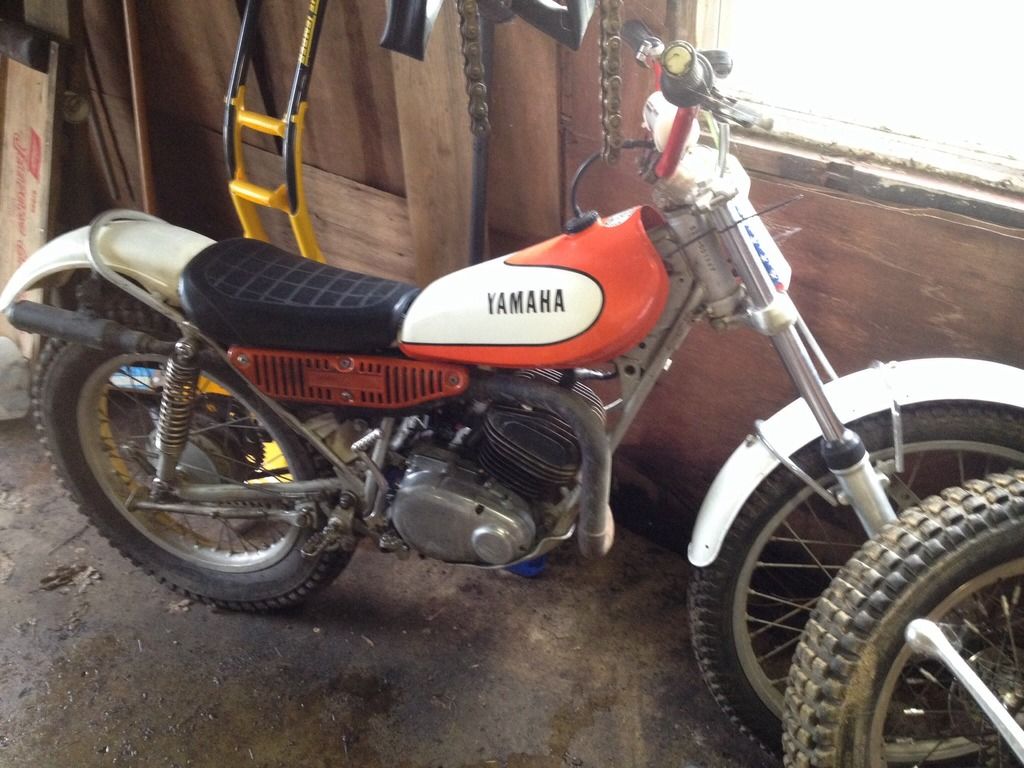


Ty175 Flywheel Weight
in Yamaha
Posted
I would be more inclined to remove from the face. Obviously that affects the moment arm of inertia. I have the weight seperated. I will probably take it to one of the most natural trials riders I have met who quit the sport to build huge pulling trucks. If your ever in Detroit I will show you the shop.
--Biff