| |
-
What motorcycle experience do you have? Have you ridden any kind of motorcycle regularly - or are you starting from scratch?
-
-
Well I don't know about Betor shocks for your Beamish - but I bought Betor shocks for a TY80 and one shock had a seal failure after 20 minutes of very light riding. I sent the shocks back to where I bought them to see if Betor would warrant them (or at a minimum I could buy a single shock and not a pair). The dealer has been trying faithfully for several months to get some response from Betor without success. I sent the shocks back to the dealer so he could see how the seal has a piece of green rubber from inside the shock sticking out he seal, and he said that Betor wanted the shock sent back - then Betor said it would cost too much to send them back. The dealer still does not have a definite answer and promised to keep working on it for me.
You may have better luck with Betor where you live - but in the US I am not impressed with their product support.
-
Back in the days we used to just mix 30 weight motor oil with gasoline at 20:1.....sometimes a spare plug was a good idea and a lot of bikes had an extra spark plug hole. Some people would fit a compression release to these holes and use the compression release when descending muddy hills as the rear tire would keep turning and not lock up as it would if you used the brake too aggressively.
If you put a second plug in.....you must put one that is the correct heat range in the extra hole. One mistake people would make was to take out their compression release if it was acting up and just borrow a spare spark plug from someone to fill up the hole. Although the plug is not connected to the coil wire - it still is exposed to the combustion chamber and if the heat range is too hot it can cause the engine to detonate....or if the plug is a really hot one the electrode can melt and during the process it sometimes melts a hole in the piston.
-
I have had good luck using a spray contact adhesive. Mask the area around the edge of the sticker and the top of the decal, then hold the decal up with a gloved hand and spray a thin coat of adhesive on the bottom of the sticker and the mounting surface. Wait a few minutes for the adhesive to set up then push the sticker back down. Allow things to set then peel off the masking tape. Any excess adhesive uually can just be rubbed off with our fingers as it balls up under your fingers - yet does it does a good job of holding stickers on. As said the previous post - you have to get the dirt out that is stuck to the old adhesive or you will end up with lumps in your decal.
-
Oooops. I use 350 Fahrenheit (176 Celsius) to 400 F (200 C). Looks like we use the same temperature for the exhaust curing.
-
Sorry that you had such bad luck - way back around 1976 I painted the cases on my 1974 Kawasaki 125 with some hardware store silver and clear coat.....and the first time fuel hit the paint it ran right off. I feel your pain - although the pain has diminished after 34 years!
The new spray paints are kind of misleading these days and it is hard to identify if you are buying a lacquer or enamel sometimes. I have bought sandable primers only to find out they were enamel primers after I sprayed some lacquer finish coat and had them wrinkle.
Lately I have been using the Dupli-Color paints with very good luck. The exhaust paint is supposed to be baked at 350 degrees for 2 hours.....or 400 degrees for an hour and a half.....and I can usually find a time when the wife is away for that long and get it done before she gets home. When I first run the engine with the fresh exhaust paint I let it idle a bit and when the exhaust is getting hot I shut it off - I will do this about 6-8 times before I actually run the engine at speed and I have never had any of the paint peel off. Dupli-Color also has engine enamels that work very well on the cases and cylinders. I have never had any fuel related issues with these paints.
The Dupli-Color High Temp paint is listed as being good to 1,200 degrees, and PJ-1 makes a black exhaust paint that is listed as being good to 1,500 degrees.
-
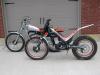
Wow!!!! That is much too nice ride......You are going to buy a "beater" bike that you can get dirty!
-
I have plenty of experience with stuck caliper pistons in cars.....maybe some of it will help you with your bike.
I would first start by removing the caliper from the forks and taking the brake pads out while leaving the brake hose attached - then pump the brake lever until the pistons come out as far as possible. Then remove the brake hose and take the two caliper halves apart. Generally when rebuilding calipers I can get the pistons out by just using a compressed air nozzle on the caliper. Take the two halves and wrap a rag around the caliper so that when the piston comes out the rag will catch the piston and the brake fluid.....then apply the compressed air to the passage for the brake fluid and blow carefully (you may have to hold your finger over any extra holes or put a bolt in the hole where the brake hose attaches on the outer caliper half).
If that doesn't get the piston out another way is to use a grease gun. On the inner half you can use the bleeder screw to pump grease into the caliper - but you must plug/block the passage that routes the brake fluid over to the outer caliper. Blocking the passage can be done by inserting a thin piece of metal over the hole (between the caliper halves) and then bolting the two halves back together. You can also do this for the outer caliper but you will have to make a special fitting that will adapt your grease gun to the brake house inlet. If you have to use the grease gun method - be sure to clean all the grease off everything as the most seals are not compatible with grease and will swell when they stay in contact with petroleum products......and the brake shoes and disc don't benefit from having any grease on them!
Good Luck.
A
-
For us guys - I believe the boot size on the Gaerne boots is very close to shoe size.....I have no idea if the boots available has womens sizes or if you will have to find out what the equivalent mens size is for your feet. I have very wide feet and all motorcycle boots are tight on me as no one makes a boot in a larger widths. I have to wear very thin socks with my Gaerne boots to make it possible for me to wear them until I can stretch them out a bit.
I did try on some motocross boots at a local motorcycle shop and they were horribly stiff and I am not sure how well the sizes relate to the available Trials boots - but it would certainly get you in the ballpark. Ryan Young Products is located about 1.5 hours away from me and I eventually just drove down to see them and tried on the boots at is shop.
-
I have never owned a Honda Tl125 - but one cause of the problem you are describing is a lean condition that can occur on 4 stroke bikes when you just start to open the throttle. As the throttle opens the vacuum in the throat drops and the fuel flow from the carb doesn't increase when the vacuum drops. Accelerator pumps are used on some cars and motorcycles to correct this problem - others use the constant velocity carbs that have a throttle plate and a vacuum controlled needle and slide. On the accelerator pump carbs there is a little shot of fuel whenever you open the throttle quickly - and on the constant velocity carb when you open the throttle quickly it moves the butterfly and the slide and needle drop until the vacuum builds up enough to pull the slide and needle up.
My thought would be to try setting the idle mixture just a bit richer and see if that helps. If that doesn't help - then clean the carb thoroughly and check the float level. It may also help to raise the slide needle by lowering the clip - but this will richen the mixture at all rpm's above idle.
My thought on plugs.......as long as you have the right heat range and a good plug.....they really don't make much of a difference beyond extended life. If the plugs made a huge difference the original equipment manufacturers would use them. If the builder could improve the performance of their product by just putting in a better spark plug - they would as they are spending millions of dollars trying to improve the performance of their engines. Back in the old days we used to change spark plugs every 10,000 miles on cars as the tips would start to round off and performance was affected - but modern Platinum and other exotic metal tips have made spark plugs with 50,000 miles on them still work fine and look like new. When you have a single cylinder engine it really doesn't cost much to try exotic plugs......but for 4,6 & 8 cylinder cars it can get pretty expensive. You can get a much better spark plug today than you could in 1974 when your bike was built - but they will not help your bike run much better if it has other mechanical or fuel related problems.
-
As the previous post suggests...JB Weld is an epoxy that works great for repairing metal. The forks should be cleaned well to remove any traces of oil from the scratch. THen the JB weld should be applied to just fill the gouge a little high - and then when the JB Weld has set you can carefully file it flush with the surface. A file may work best as it is flat and should not cut into the chrome on on the fork legs. If you can't get JB Weld where you live.....try and find an equivalent industrial epoxy. The slower an epoxy sets up.....generally makes it stronger.
-
When I got my new Sherco I noticed that there was some drag when I pulled the clutch lever with my index finger....and the lever was against my fingers that I had wrapped around the grip. The cure was to move the clutch (and brake) levers inward until you could pull the clutch in with your index finger enough that the clutch did not drag anymore. On my bike the lever mounts are in as far as they can go as the bend in the bar prevents me from pushing them in any farther.
This works fine for me, and is a good guide for clutch action since the clutch is fully released when the lever bumps into my fingers, and starts to engage when I can feel the lever move away from my fingers.
-
I don't believe there is such a thing. Most flexible tubing that is clear is very poor under pressure and heat. The only clear tubing that I know of is used in the dispensing system for bulk soft drinks and beer and it operates under very little pressure and no heat. I also know that it does not hold up when used with petroleum fluids and it gets very stiff and stains.
When a tube is braided to reinforce it for pressure it will be impossible to see through the tubing even if the rubber/plastic/vinyl portion is clear. If you are wanting to be able to see your clean or dirty oil flowing through the tubing - the best I think you can hope for is to get some kind of sight glass similar to the clear glass fuel filters with the metal fittings on each end. I have no idea what kind of pressure rating these would have - but I know in steam boilers some of the glass sight gauges for watching the water level can hold several hundred pounds.
-
I don't think most paints will hold up. You might have luck with a 2 part epoxy or ceramic paint like they use on disc brake calipers. I believe those ceramic type paints harden with exposure to moist air and do not cure by the solvent evaporation - and I think they are less porous and less susceptible to attack by cleaning solvents.
Powder coating may work - the masking prior to coating requires special tape and plugs that are not melted when the powder is being baked. Any plastic or rubber part left in the the carb will probably be burnt to a crisp if you don't get it out before the powder coating is baked.
The new carb will probably look better, clean easier and stay fresh looking longer with the factory applied finish......but that is just the old guy, reasonable, common sense side of my brain making that comment......not the artsy part .
-
I just use a grinder and cut the heads off the rivet and then use a punch to drive the pins out. It only takes a few minutes......and it is cheap to do. A bench grinder or hand held grinder works fine.
-
From another "older guy" that is new to trials.....welcome.
Well......things have changed a lot in 35 years. I live in the USA and only started riding trials a few years ago. I rode Motocross and Scrambles in my youth and stopped when I went to college, and I didn't own a bike for 35 years. I bought a Suzuki RL250 to ride around the farm a few years ago. I did not want a loud and fast race bike at this point in my life and I figured a trials bike with a seat would suit me best and I bought the vintage Suzuki as I was familiar with the brand and new how to work on it. After I had the Suzuki a year I started to get interested in a modern trials bike and bought a used 2004 Sherco 290. I found that the 2 stroke motor was not well suited to riding around my woods at slow speed for hours - and I later sold it and bought a 2009 Sherco 320 that has a 4 stroke engine. The 4 stroke engine suits my riding style much better and I am having a lot of fun. I am getting much better at balance and I can cross logs up to about 3 feet.......no "splatters" or "Jap Zaps" at this point in my life....I am working on hopping the front and rear to allow for better sharp turns.
You need to go out and find some locals or a dealer that will let you ride a few bikes and find out what style of bike you want. Do you want to ride vintage style trials - or would a modern bike be better suited to your needs? The modern bikes are incredibly agile and will go places that my RL250 wont go. The Suzuki feels very heavy and cumbersome compared to the Sherco - and when you get stuck the Sherco is much lighter and easier to handle. The seat on the Suzuki is nice when on long smooth rides - but I have found that I can ride the Sherco for 6 hours in an outing and I never really notice that I have been standing up almost non stop (my wrists are what seems to get tired).
Good luck in your search.
Dave
-
Why did it shear off? Are the threads corroded or stuck, was it too tight, was the head damaged in some way? If the original bolt sheared off - it is not unreasonable to think that a smaller diameter bolt threaded inside the original one will just shear off as well...and left hand taps and hardened left hand bolts are difficult to find.
Left hand drills some times work when the bolt head was sheared off from someone trying to tighten it too much - once the head breaks off the stresses are relieved and the threaded portion comes out pretty easily. You can sometimes use a small punch and tap the bolt in a counterclockwise direction until enough sticks out that you can get a grip on it with some pliers. I have also on occasion been able to place a nut over the stud and weld through the nut and get a good enough attachment to the stud that it can be turned out with a wrench.
When the threads are corroded or cross threaded so tight that the head breaks off while trying to loosen the original bolt, it can be very hard to get the original bolt to come out. I sometimes have success with the "easy out" approach and the hardened tools sometimes will remove a stuck bolt - but not always (Be very careful not to break off a hardened tool in the bolt - you will have to use a Dremel tool with a small grinding stone to get it out.....and it takes many stones and lots of time to grind it out of the tiny hole). Sometimes I have to very slowly drill the bolt out with successive sizes of drills until most of the original bolt is gone and you can pick the bolt theads out of the grooves with an ice pick.....this is always very risky when you have to go this far to remove a stuck bolt. It is very important that you use a center punch to accurately drill the center of the bolt when you first start drilling. If there are any threads on the case that are visible I sometimes put a bolt of the right size and thread in my lathe and then bore a hole through the center of the bolt with the drill I am going to use - then I can insert the bolt into the case and drill through the bolt and it will automatically center and align the drill.
Good Luck!
-
Here is the link for the Sherco site......and Wayne has a section on fork seal relacement that may help. He also has other articles that might help you in the future.
http://www.sherco.com/wayne_corner.html
-
I bought a used 2004 290 with that problem. The tank had grown lengthwise and the rear part of the tank had moved back on the mount so much that the screw would barely go into the mount. The tank no longer rested on the frame along each side of the tank and the bottom of the tank had become very soft and flexible. My 2009 started to develop the same problem after only a few months. The problem I have is that all the local stations have 10% ethanol mixed in the fuel.
I had to buy a new tank for the 2004, and on the 2009 I drained the fuel out and let the tank sit in a very warm sunny spot for a few weeks and it returned to the normal size.
Since then I have been able to find a fuel distributor that sells gasoline to farmers for off road use and they don't add ethanol to this fuel, and I have not had any problem since making the switch.
-
I know how bothersome a dent on your new bike could be.....I wondered when the new bikes came out with the tank on the side how easy they would be to dent. I bet it will not be long until someone comes out with a carbon fiber or plastic tank protector.
I would be nervous about using any pressure related scheme to pop out a dent. It could work - but my concern is that you will get very little pressure on the dent - but a whole lot of pressure on the seams. I don't know how big the dent is - but if you put 2 psi of pressure in the tank and the dent is a 2 inches in area....you will get 4 pounds of pressure spread across the dent (and if it does move what will keep it from moving too far). My big concern is that if the tank is 12 inches long and 4 inches wide the 2 psi will have placed 96 pounds of pressure that will be trying to seperate the seams on the tank. (I would be surprised if you could get more than 15 or 20 psi in the tank before it explodes.....20 psi would be 960 pounds of pressure pulling at the seams of the tank if the 4x12 tank size I guessed is close to accurate). Also there is no way to control where the pressure is pushing - so it will push on everything and the weakest point of the tank is what will move. The ice method is not a good idea - the ice will probably just split the tank open.
I think the best approach is the paintless dent removal people if they can get to the dent through the filler opening. Another approach would be to cut the tank open from behind and push the dent out from behind then weld it back up, or just cut out the dent and have a patch welded on.
-
I bought the Gaerne boot oil.....and I love it and I think it would be hard to find something that works as well. I use Mink oil and an even better product called Boot Grease on my work boots to keep them waterproof and flexible - however these products turn the boots very dark and they are greasy and dust sticks to them.
The Gaerne oil goes on very wet and oily and it turns the boots very dark initially, and the first time I used it I thought it would forever make my boots look crappy. Overnight it dried and my boots were a very nice light brown color and they looked great.
The Gaerne oil is very easy to use. Knock off any thick mud or dirt, take a stiff bristle brush and remove any dirt and dust, apply the oil using a small piece of rag or a brush, then let them sit overnight and take a rag and wipe off any excess in the morning.
In my opinion......the Gaerne boot oil is the best thing to use on you Gaerne boots.
-
Looks nice.
Here is a link: http://cgi.ebay.com/ws/eBayISAPI.dll?ViewItem&item=280571310811&ru=http%3A%2F%2Fshop.ebay.com%3A80%2F%3F_from%3DR40%26_trksid%3Dp3907.m570.l1313%26_nkw%3D280571310811%26_sacat%3DSee-All-Categories%26_fvi%3D1&_rdc=1
-
I don't think anyone makes a tubeless front tire.
-
I have not yet needed the extra capacity....but I was thinking of buying a tank from this company. They are considerably cheaper than the one made specifically for trials bikes. I think they would be easy to adapt to a fork/number plate mount. I am not sure they would be any cheaper if you had to ship them from the USA.
http://www.usplastic.com/catalog/item.aspx?itemid=24889&clickid=redirect
|
|