| |
-
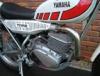
TY250E should look like this:
shaft retained by a circlip. The spring hooks around the arm on the moving end and through a hole in the frame bracket on the static end.
hope this helps
Rich
-
For a manual try www.computeroutpost.com.au - they used to sell the Cycleserv manual covering the TY250B model, close enough to the E model for general restoration work. Cost $51 (australian dollars) to buy and ship to the UK.
To dismantle your forks, drain the oil and use an air impact gun to loosen and remove the bottom damper tube allen bolt before you remove the top caps and springs. Once there is no weight on the damper tube it can just spin as you try to unscrew the bolt, so having some spring tension in there stops it spinning.
There's loads of stuff in the archives about TY forks and how to dismantle etc.
For parts try www.Francetrialclassic.com/uk and also www.yamaha-majesty.com who do trick fork caps with preload adjustment and modified damper tubes etc.
Best of luck.
Rich
-
Can second Philpotts for fork stanchion refurbs,
-
Dear All,
If anyone is running/building a TY250 twinshock and needs a standard airbox, there is one on the UK auction site that rhymes with bidet at the moment. Item number 230609807568, part number 434-21240.
regards
Rich
-
I would be wary of using 'super' unleaded as I found it caused my brand new fuel lines to swell. Gone back to normal unleaded and no further problems. I heard that up to 10% ethanol was added to normal unleaded to boost the octane, so maybe this affected the fuel line.
Have also started adding Yamalube fuel stabiliser as a precaution to stop any gumming up. No further problems so far.
-
I discovered that weld through primer makes a good exhaust paint. I used the UPOL weld-through primer aerosol (from Halfords) on a TY250 front silencer after a quick sand blast to remove the surface rust. The colour comes out as very close to an aluminium silver matching the WES back box, so far it has not rusted, flaked or discoloured. I even tried burning it off a test piece with a plumbers blowlamp and it survived in the flame for a good 30 seconds before discolouring, but still did not blister. Obviously this stuff is designed to protect spotwelds from corrosion so it must be capable of surviving high temperatures.
regards
Rich
-
Dear Bill,
To make a tool to pull the crank into the case with main bearing installed you can use the following:
Cut the lower 30mm off the bottom of an old rear damper tube then remove the piston rod leaving the remaining section of the damper tube which should fit snugly over the end of the crank and match the size of the main bearing inner race.
Now weld an old wheel spindle nut to the end of a piece of M10 threaded rod.
The nut and M10 rod can be screwed onto the crank (same thread as the flywheel nut) and using a large washer and M10 nut pull the crank through the main bearing using the tube from the shock.
Same principle as the factory tool but using stuff you will probably have lying around.
regards
Rich
-
I would second Stork's comments. Auto transmissions have multiple epicyclic gear trains, wet clutches, bearings and seals all in a hot environment. I used to repair Renault automatic gearboxes and never saw a bearing fail, it was always the hydraulics valves or clutches which gave trouble. I've used Castrol TQF (ATF) Dexron III spec in my TY250 since its rebuild and had zero shift or clutch stick issues. Dexron III spec has extra additives. Mobil ATF220 is also a good Dexron II spec fluid which is mineral based.
-
Ah, someone else who bought the Avatar DVD and didnt like it on the little screen without the 3D.
-
very neat, although you won't be able to use it if you only have a daytime MOT ;-)
-
Also worth checking that the clutch release axle wedge (where the wedge shaped cam on the arm hits the end of the pushrod inside the gearbox case) hasnt got damaged. Mine had a lump of case hardening missing on the edge which contacts the pushrod. This will also give you a notchy clutch action. I ended up fitting a NOS part.
To do the adjustment: loosen off the adjustment screw locknut. Turn the screw clockwise lightly until it stops (do not force it further). Now turn the screw anticlockwise and note the position of the release arm.
The total range of adjustment is only half a turn. On the end of the adjustment screw is a pin which locates in a groove in the release arm. The pin is offset in relation to the centre line of the adjuster screw, so as you turn the screw it raises or lowers the release arm by a few mm. When the arm is at its lowest point the thickest part of the wedge is in contact with the pushrod. So to eliminate play you turn the screw till it moves downwards and touches the pushrod, then back it off a little and tighten the locknut.
It sounds like you had it in the lowest position but still had the problem.
-
I've chucked a few photos in the TC garage of the whole bike.
-
Here's my solution to chain rub on my expensive powder coated swingarm: make up a small chain guide from sheet alloy lined with carbon fibre or nylon. The guide is secured at the rear by a cap head bolt screwed into a riv nut set into the swing arm chain lube filler hole, it wraps around the swing arm at the front.
-
Hello,
Your bike is pretty close to mine (493-300925 frame and engine) which is from the 1977-78 build period. Might be you have a slightly later frame with an older engine. If you are ordering spares for the engine then you should be OK using those dates.
-
Hi Squid,
A torque wrench is essential for 'critical' fasteners like head nuts, flywheel nuts, clutch hub nuts etc.
A digital torque wrench will convert the settings for you.
Have a look at this as an example of whats out there:
http://www.toolstop.co.uk/index.php?option...utm_medium=base
-
Hi BMF,
Check the wire from the coil down to the magneto for signs it may be fractured inside the insulation, particularly where it enters the crankcase cover.
Check the condenser resistance when it is warm (not running) should be more than 3 Mega ohms. (measure between coil small terminal and earth with points open)
If the problem appears to be heat related then its worth checking the ignition coil resistances with a decent digital multimeter:
primary winding 4.5 ohms
secondary winding 6 Kilo ohms
Check the magneto coil resistance when it is cold (coil terminal to earth with points closed), then compare to when the engine is warm and stops running. If it goes short circuit, open circuit or much higher resistance you have found the problem.
Magneto pulse coil resistance 1.6 ohms
(note: above specs are for a TY175C, sure it wont be far away for a 'B')
I can recommend the electronic ignition kit from John Cane, it was simple to fit and works well. I would also suggest changing the woodruff key/magneto spring washer/nut as mine was half way sheared through.
regards
Rich
-
Hi BOC
The part number for the spring is 6015/636 (FNR13268).
On the website the part is listed by model e.g. TY250. Cost to buy and ship from Germany is
-
I have fitted the Wirth Spring kit to my TY250E. The Wirth springs are a heavier gauge wire and about 50mm shorter than the standard Yam springs, Wirth supplier a longer spacer to suit the new springs. I have also soldered up one of the 2mm damper tube holes on each leg to slow down the rebound damping. I'm using 10w-40 engine oil in the forks filled to 130 mm from the top of the legs (springs removed and fully compressed).
All this results in a less mushy feel to the forks and damping is much improved. Unladen sag has been reduced by about 8 mm.
-
Hello Squid,
You may be able to squeeze in a cycle spanner, they are usually much thinner than 'normal'. You'll need a 14mm open end spanner to fit the standard square weld nut.
-
Hi Alan,
Im currently using NGK B7ES (standard plug) in my TY250 with electronic ignition and running 50:1 premix. No issues with oiling up or overheating so far. I have been considering trying B7EV for better low speed spark: anyone tried them?
I used Champion N3G in the TY175 which seemed to cope with long road sections and still didn't foul up on slow sections.
-
Hi Paul,
I think the Mikuni VM26SS 49362 was original equipment on the TY250D (1977 ish). It is fitted on my 78 model (engine number range 493 300xxx).
Listed standard jetting is as follows:
main jet 150
needle jet N8
Jet needle/clip position 4L6 / 3rd groove
cutaway 3.0
pilot jet 35
starter jet 40
air screw 1 1/8 turns out
float level 23 mm +/- 1 mm
idle speed 1100 +/- 100 rpm
hope it helps
Rich
-
Hi Gronno,
Just looks like a spring washer that has been sitting in the crankcase or some part of the air inlet duct after the rebuild and was dislodged and then sucked into the cylinder when the bike fell on its side.
its easy for a stray washer to fall into the crankcase unnoticed. Always good practise to put clean cloths around the crankcase mouth when working on the bike to stop things falling in. Not pointing any fingers but young kids also have a habit of picking stuff up and pretending to mend the bike 'like dad' and then dropping things into inaccessible places. Keep an eye on them if they're in the garage!
Had a similar thing recently when someone changed a liitle end bearing and a needle fell into the crankcase unnoticed, it was later sucked up into the transfer port and jammed the piston.
Unlucky really after all the hard work you've done.
Rich
-
Bon jaw Squid,
As far as I am aware there is only one o ring on the silencer pipe joint (in the groove). The Yam part number is 93210-19026.
You might also want to consider using some Loctite sealer on the joint if it is corroded or worn. Loctite 5920 is a copper rich silicon sealer that can cope with exhaust gas temperatures, it is designed for glass oven doors etc.
Ory Vwar!
-
Hello in there squid,
Well if we assume that you are working on the TY125 and it has a cylindrical exhaust, and you have taken off the whole rear silencer rather than just the baffle you can proceed as follows:
The liquid you describe is two stroke oil that has passed through the engine and accumulated in the rear silencer. If you look towards the rear of the silencer on the underside you should find a screw which retains the separate baffle tube. You will need to remove the screw and then pull out the baffle tube. This can be difficult and you may have to apply heat using a blowlamp to free off the baffle tube.
When you have got the baffle out you will see it consists of a perforated tube with a sound absorbing wadding wrapped around it. The wadding is there to absorb the sound energy and give you a quieter exhaust. I would assume that the wadding on your bike is saturated with oil so the best thing to do would be to remove it and then wash out the whole silencer and baffle with degreaser.
If there are hard carbon deposits you can try your caustic soda process or just burn it off with a blowlamp (repaint needed afterwards).
When you are ready to rebuild the silencer use new wadding (available from bike parts suppliers) and rewrap the baffle tube around the perforated section. You will need some stainless steel wire to wrap around the wadding to hold it in place. Put a little copper grease around the baffle cap where it slides into the silencer tube to stop it sticking in place and rebuild.
Some TY125 had a different silencer (more box shaped) which did not have a separate baffle, if you have one of those then you can only clean it out using the caustic soda or blowlamp method, to repack the baffle you will have to split it and reweld.
If the rear silencer is saturated with oil then it is likely that you will need to decoke the rest of the system, The front part of the exhaust cannot be dismantled but you can use the caustic soda or blowlamp technique to clean it out.
Finally I would suggest you check the autolube system on your bike to make sure it isn't delivering too much oil, if you're running premix then check your fuel/oil ratio is suitable.
Hope this helps
-
Dear All,
Although strictly speaking this is not my first post, I thought this was the best place to put this topic.
After a few years away from trials I got the urge to do a restoration of a twinshock, and as I used to have a TY175 back in the late 70's I thought a TY250 would be a good choice as I have a few extra lbs to lug around. I managed to pick up a reasonable rolling frame and engine in bits which turned out to be a matching numbers bike from 77 - 78 model year.
So after 8 months and
|
|